Want to add a reply-to email address to WooCommerce emails? Follow our detailed tutorial to have a separate reply-to email address to receive customer replies to your WooCommerce emails.
Adding a “Reply-to” email address to your WooCommerce emails is very helpful when you expect your customers to reply to your store emails. This allows you to designate a specific email address where replies from your customers will be sent, which can differ from the “From” email address. This is particularly useful if you want customer replies managed by a different team or department.
Follow these steps to add a “reply-to” email address for your WooCommerce emails easily.
Why You Should Add a Reply-to Email Address in WooCommerce Emails
Adding a reply-to email address in WooCommerce emails is a crucial step in enhancing customer communication and support. This allows customers to directly respond to transactional emails, making it easier for them to reach out with questions, concerns, or feedback. Encouraging replies can also improve email deliverability, helping your messages consistently reach customers’ inboxes. Overall, adding a Rreply-to email address reflects your commitment to customer service and strengthens your relationship with your audience.
Unfortunately, WooCommerce by default does not have an option to add a separate reply-to email address to WooCommerce emails. The sender email address works as a reply-to-email address. That means when customers reply to a transaction email it goes to the inbox of the given sender email address. But in many cases, these emails are not meant to receive emails. They usually are no-reply.example.com, donotreply.examplestore.com.
That is why, it is important to have a separate reply-to email address for WooCommerce emails. And. that’s what we are going to show you today.
How to Add a Reply-to Email Address to WooCommerce Emails
WooCommerce by default does not have a way to add a reply-to email address. That’s why we need to use a plugin to do that. For this tutorial today, we will use Email Customizer for WooCommerce – Virfice plugin. Apart from adding a separate reply-to email address, you can customize WooCommerce email designs, add additional content, and add social media links to your WooCommerce emails using this plugin.
So, Let’s get started.
Step 1: Install and Activate the Plugin
If you haven’t already installed the Email Customizer for WooCommerce – Virfice plugin, Install the plugin just like the way you install any other WordPress plugin.
Go to your WordPress dashboard. Navigate to Plugins > Add New. In the search bar, type Email Customizer for WooCommerce – Virfice.
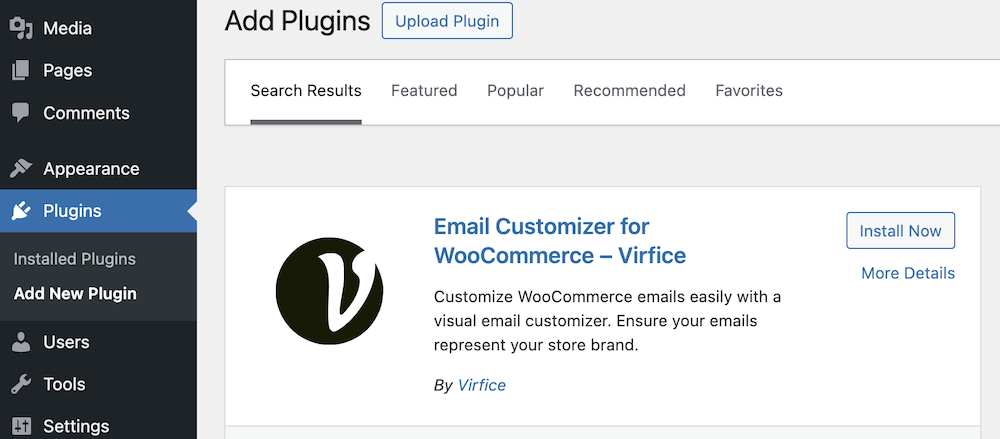
Click the “Install Now” button next to the “Email Customizer for WooCommerce – Virfice” plugin. Activate the Plugin: Once installed, click “Activate”.

Step 2: Add a Reply-to Email Address to WooCommerce Emails
Once the plugin is activated: In your WordPress dashboard, go to Virfice > Settings. You will find “Basic settings“. Now you will see Reply-to name and Reply-to email address fields.
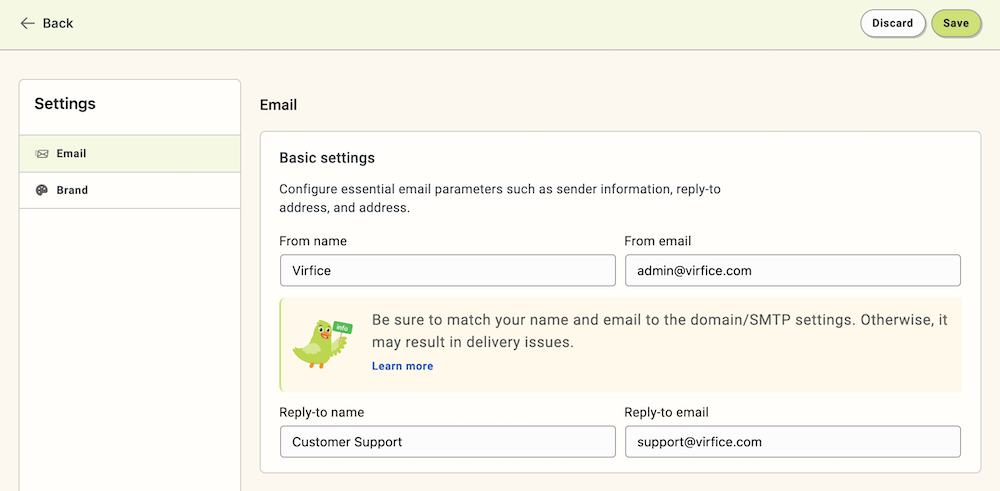
Place your preferred Reply-to name and Reply-to email address and click on Save at your top right to save the changes.
Step 3: Send a Test Email
To ensure that everything is working as expected It’s a good idea to send a test email to verify that the “Reply-to” address has been correctly applied.
Go to email brand settings again (dashboard > Virfice> Settings. Now click on “Brand”. Now click on “Customize”).
Now select the email type on your right panel and click on “Send test email”
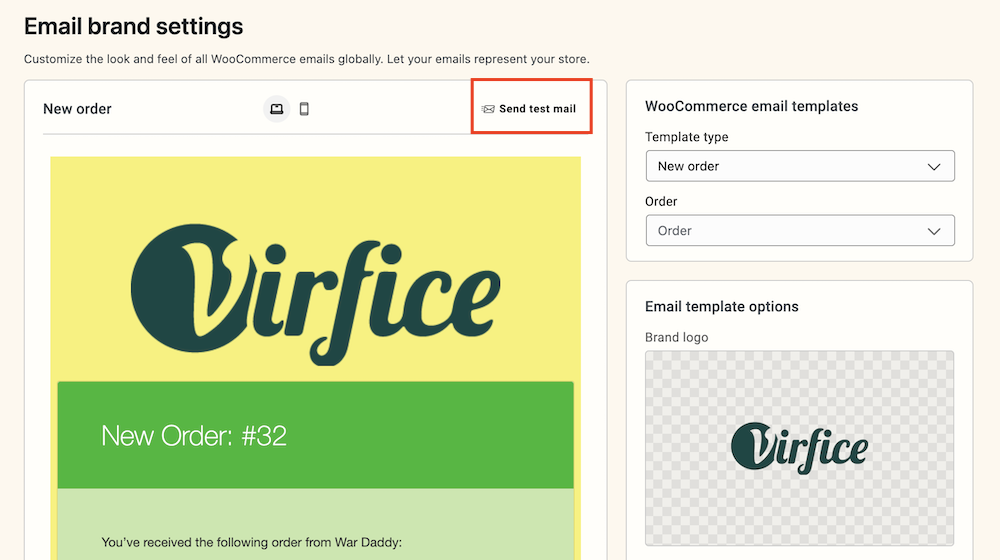
A modal window titled “Send test email” will appear. In the “Recipients” field, enter the email addresses to which you want to send the test email. Separate multiple email addresses with commas.
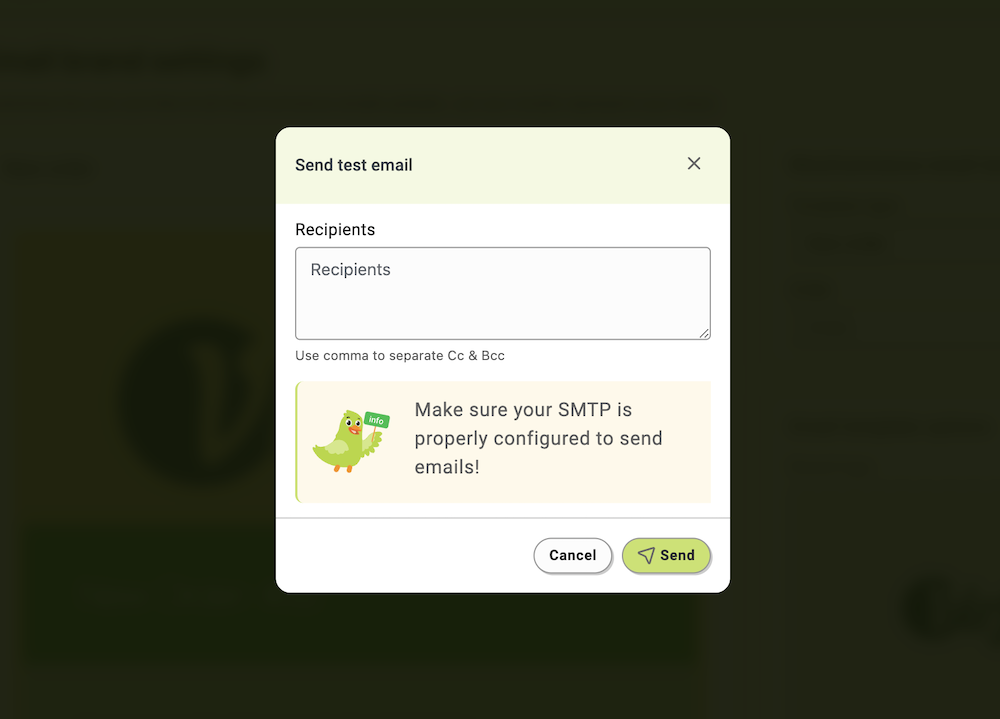
After entering the email addresses, click the “Send” button.
Note: You need to make sure your SMTP is properly configured to send emails!
You can also reply to the email to see if the replied email is going to the given reply-to email.
With the Email Customizer for WooCommerce – Virfice plugin, adding a “Reply-to” email address to your WooCommerce emails is a straightforward process. This small but powerful customization helps ensure that customer inquiries are directed to the right place, enhancing your overall communication process.
By following these steps, you can easily manage where customer replies are sent, providing a more organized and efficient way to handle customer interactions.