Want to add WhatsApp live chat to WordPress sites? Follow our guide to learn how to integrate WhatsApp with your WordPress and WooCommerce store quickly and easily.
Adding WhatsApp live chat to your WordPress site is an excellent way to connect with visitors, boost engagement, and provide real-time support. WhatsApp is widely popular, and many users prefer communicating through the platform due to its ease of use and instant messaging capabilities. For store owners, WhatsApp is a great tool to interact with potential customers in an e-commerce setting.
Whether you want to add WhatsApp live chat to a WooCommerce store or a standard WordPress site, our guide will walk you through the process.
There are several ways to add WhatsApp to your WordPress site. We’ll show you how to do it both with and without a WordPress plugin. Let’s get started!
Why Add WhatsApp Live Chat to WordPress Sites?
Since you’ve made it this far, you likely already have your reasons to integrate WhatsApp live chat into the WordPress site. However, there are additional benefits you may not be aware of.
WhatsApp is one of the most popular communication apps that people use every day. There may be many potential customers who prefer to communicate via WhatsApp, and you might not even realize it.
Before diving into the steps, let’s explore why integrating WhatsApp chat into your WordPress website is a great idea:
- Instant Communication: WhatsApp offers real-time communication, which helps in quick responses to customer queries.
- Customer Convenience: Most users are already familiar with WhatsApp, making it easy for them to engage with your business.
- Build Trust: Offering personalized and quick support can improve customer trust and satisfaction.
- Higher Conversion Rates: Direct communication can help resolve potential customer doubts, leading to higher conversions.
How to Add WhatsApp Live Chat to WordPress With a Plugin
WordPress offers over 60,000 plugins, providing solutions for almost every problem you can think of. So, it’s no surprise that you can find a WhatsApp plugin for WordPress to get the job done.
In our case, we’ll be using the WP Chat App plugin to add WhatsApp to WordPress, thanks to its ease of use, positive customer reviews, and robust customization options.
Let’s get begin!
Install and Activate the WP Chat App Plugin
Log in to your WordPress Dashboard to install the WP Chat App plugin. Navigate to “Plugins” and click “Add New“.
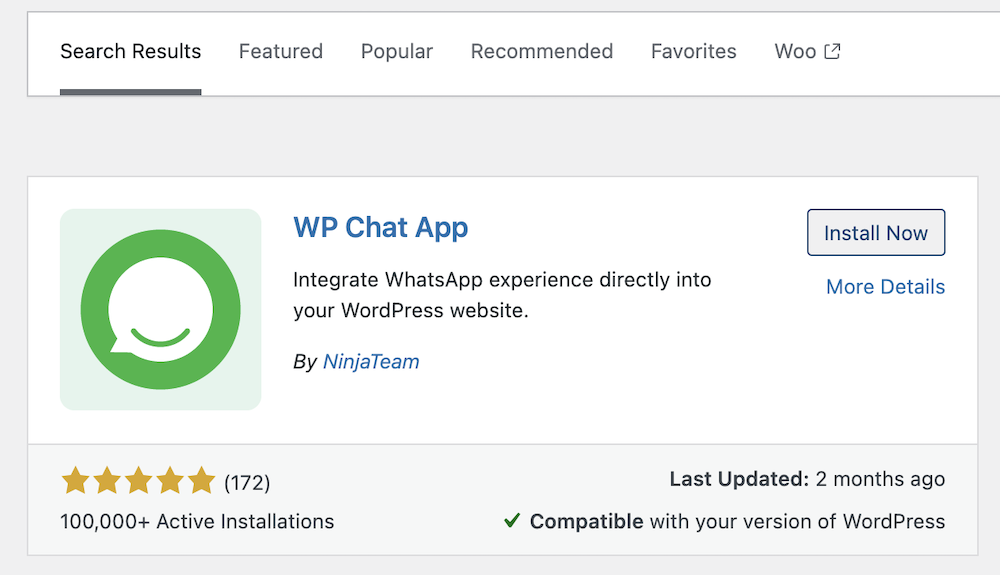
Type “WP Chat App” in the search bar and press Enter. Find the plugin developed by Ninjateam and click “Install Now”. After the plugin is installed, click “Activate”.
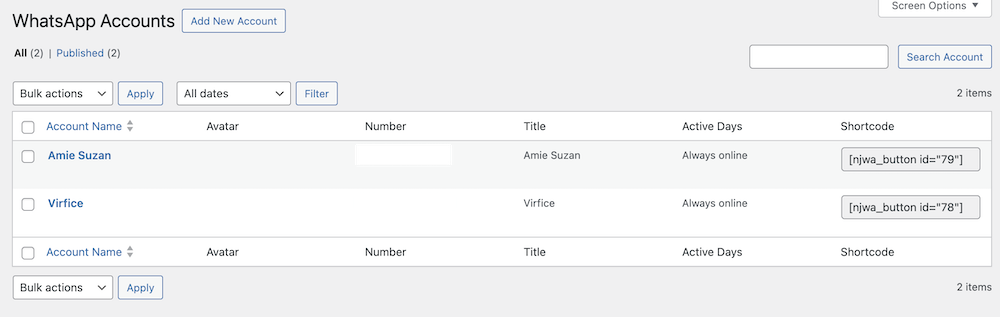
Add Your WhatsApp Account to the Website
Go to your WordPress dashboard and click on the “WhatsApp” from the left-hand menu. This is where you will be able to add your WhatsApp account to the website that you want your customers to find on the live chat.
Click on “Add New Account”, fill out the fields with the required details.
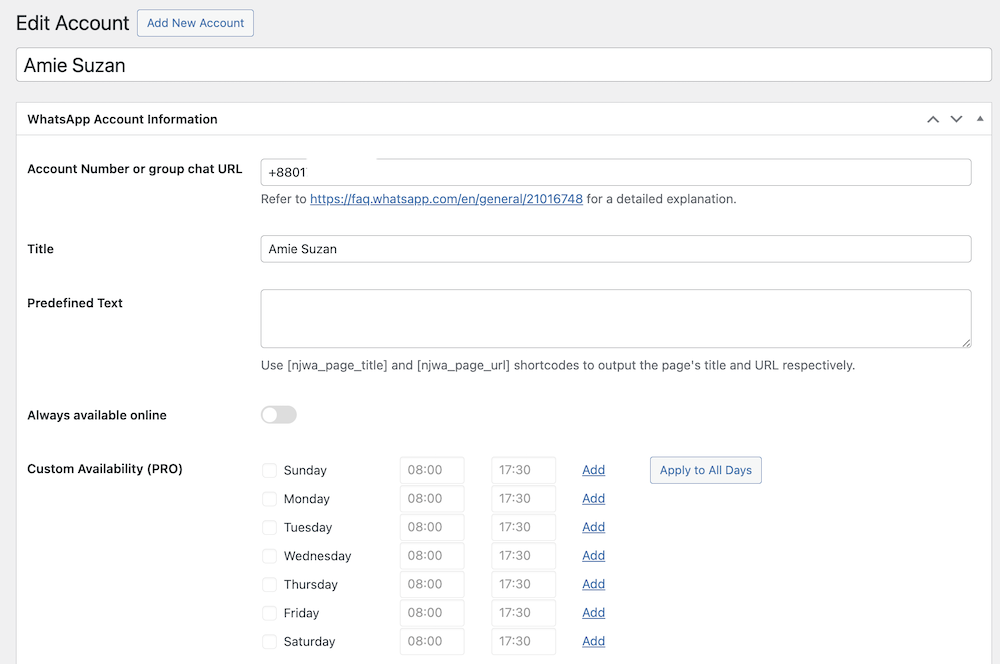
Customize the look of the WhatsApp button for this account. You can add button labels, change colors, and more.

Publish the account once you have provided the information correctly.
Note: You can add multiple WhatsApp accounts to your website.
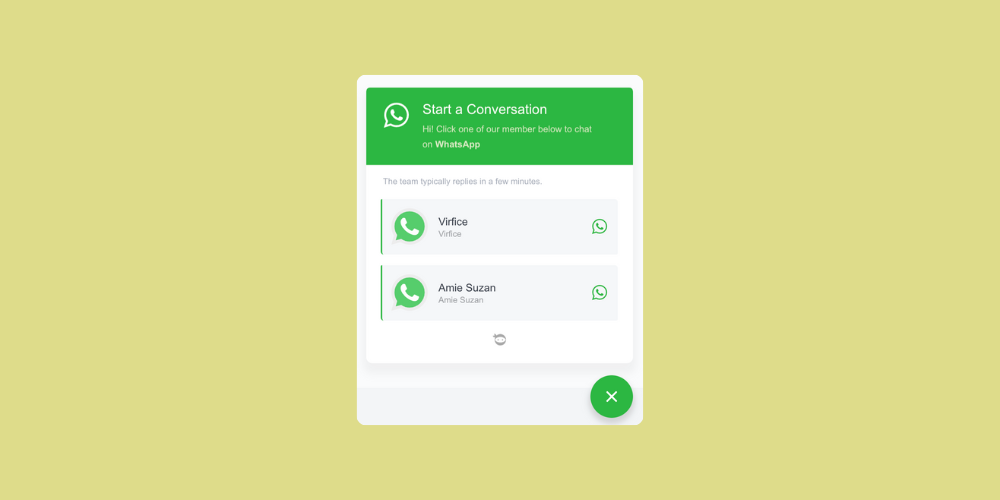
Choose the Floating WhatsApp Widget
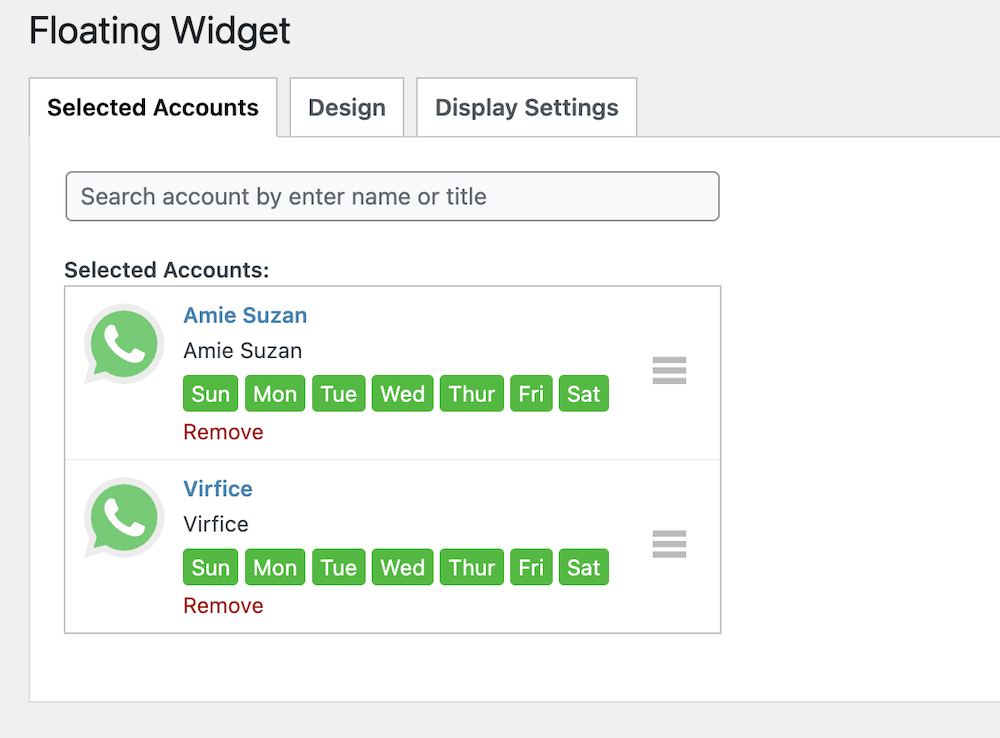
Once you have connected your WhatsApp number by creating an account, you need to choose the account to be available on the Floating Widget on your site.
You can add one or multiple accounts here for customers to choose the chat agents too.
Go to Dashboard > “WhatsApp” and click Floating Widget. Choose accounts by searching names.
You can also design a floating WhatsApp widget to match your site design. There are plenty of free and premium options to customize the “Floating Widget” for your site.
Go to Dashboard > “WhatsApp” and click Floating Widget > Design.
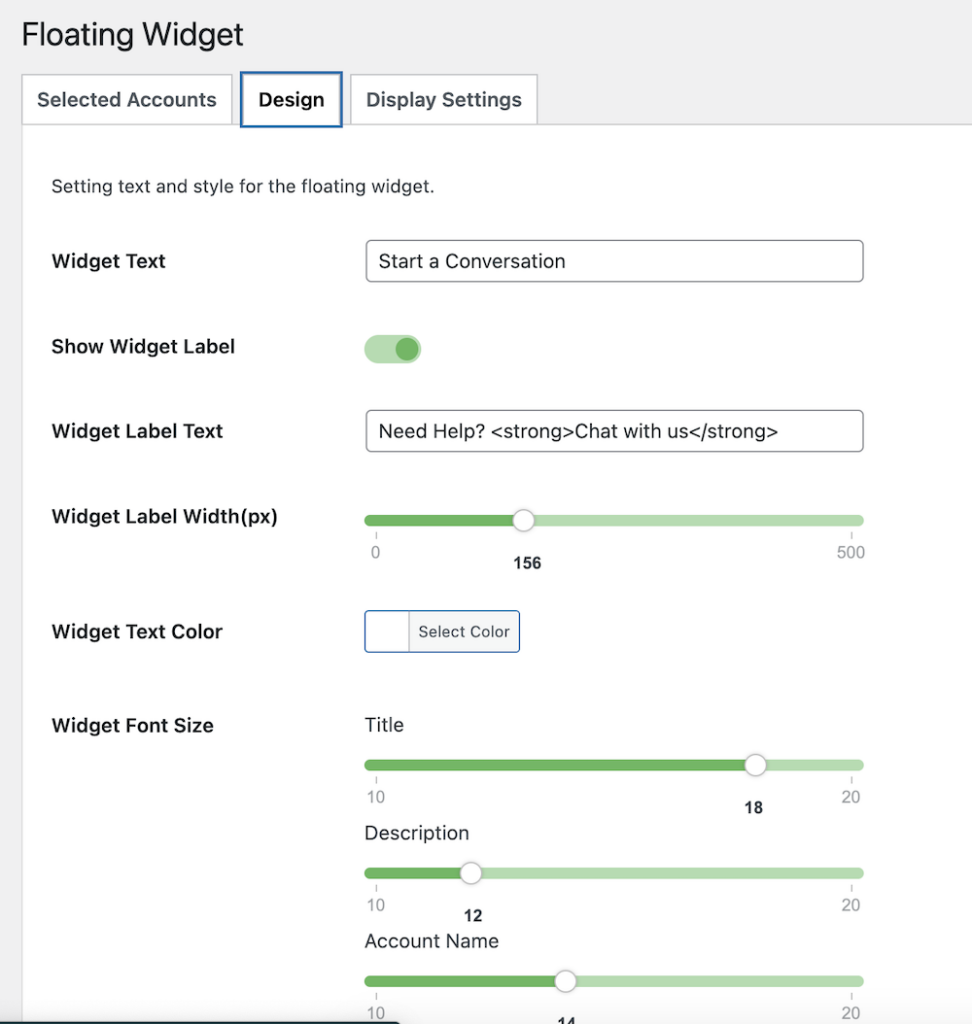
Now customize the look the way you want.
Add a Custom WhatsApp Button to WordPress Using Gutenberg Block
For a lead-collecting campaign, search for the “WhatsApp button” block in the Gutenberg editor. With this block, you can choose an existing WhatsApp account or add a new number, and customize the button’s style and color.
In the Gutenberg editor, search for the block called WhatsApp button and add it to the post or page you are on.
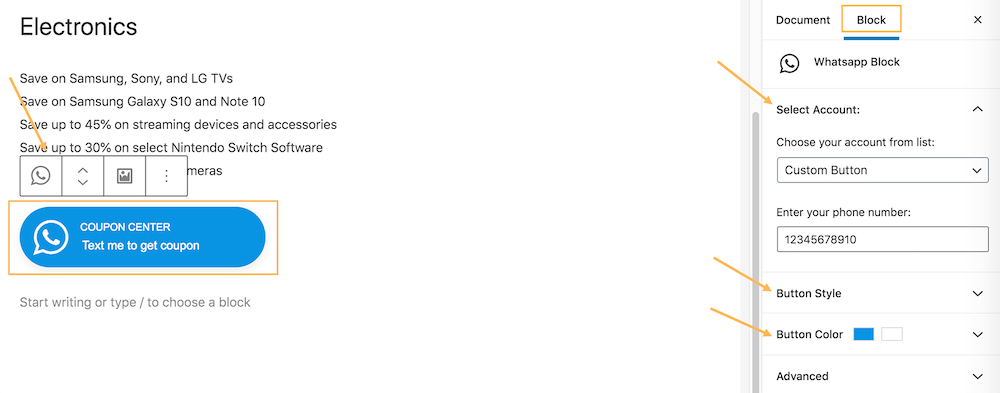
Now configure the Gutenberg block by setting up the phone number and customizing the WhatsApp button. Once you are done, publish the post/page.
Add a WhatsApp Button to WordPress via Shortcode
If you have places where Gutenberg blocks aren’t supported like you are working with a page builder, you can use the shortcode to place a WhatsApp button. Here’s how.
As you set in the plugin, every member account has its shortcode that you can copy and paste anywhere on your site.
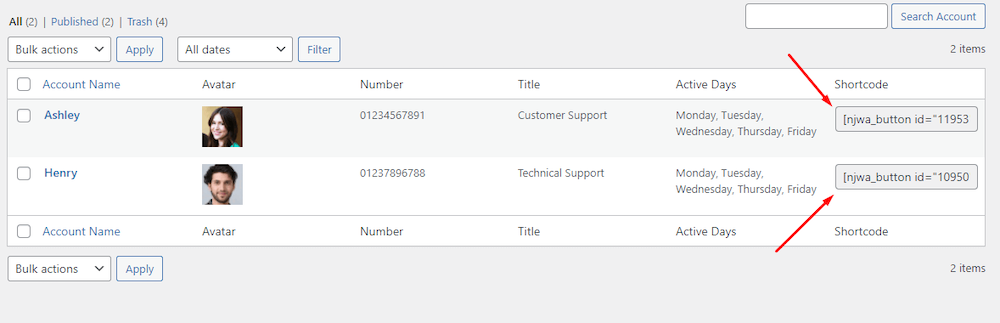
You can select a specific member or field expert to display their WhatsApp contact. Then, simply paste the corresponding shortcode into the Classic or Gutenberg editor of the page or post.
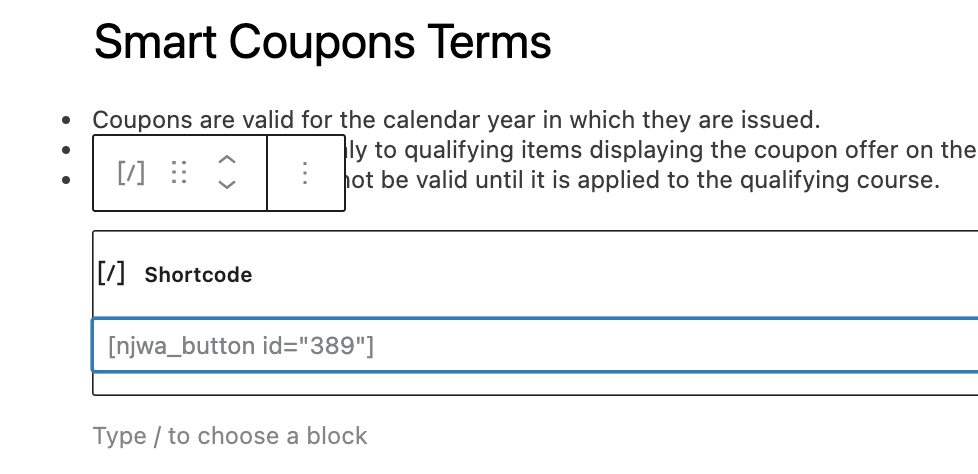
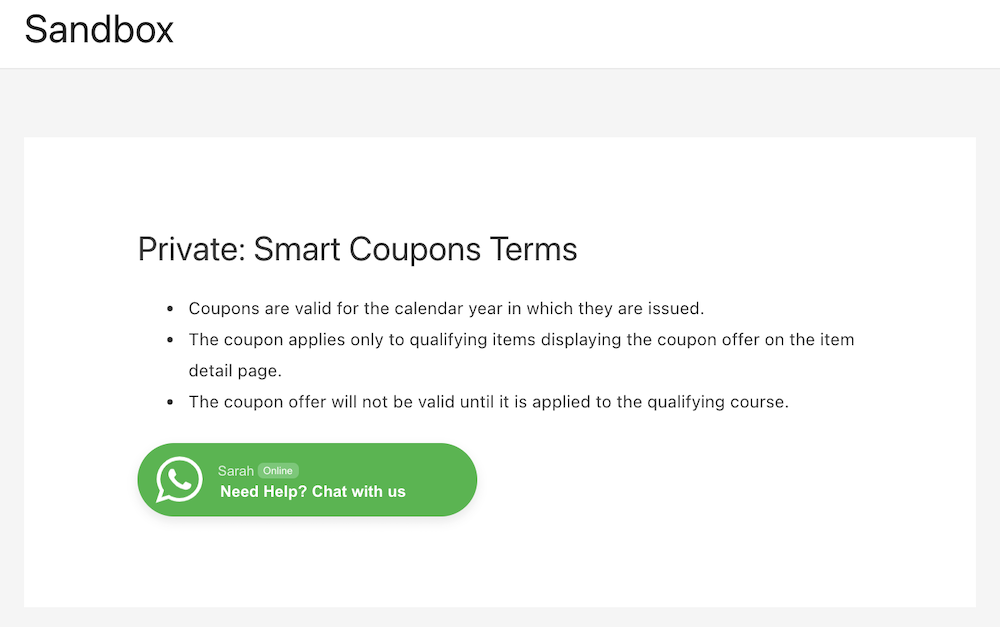
Once you have pasted the shortcode, save the post or page to make it work. Here’s how it looks on your site.
Set Availability Hours for WhatsApp Live Chat on the WordPress site
If you have specific hours of operation, you can configure your availability settings: you can specify working hours and set away messages.
Go to your dashboard > WhatsApp > All Accounts. Now edit an account to specify available working hours.

Now disable “Always Available Online” and it will open the working hours and options to set away the message. Set it up and be sure to update the account once done.
Specify your working hours. The chat button will only be visible during these times. Also, set up an automated message that will be displayed when you are not available.
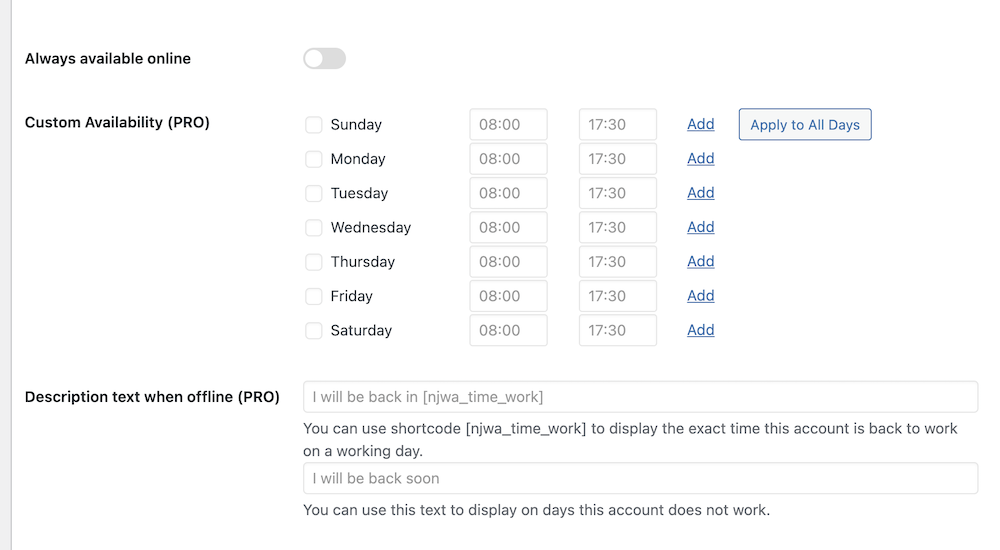
For instance, “We are currently offline. Please leave a message, and we’ll get back to you soon.”
Test the WhatsApp Live Chat Button
To ensure everything is working correctly, visit your site and click on the WhatsApp chat button. It should open a new tab or the WhatsApp app (if on mobile) and start a conversation with the pre-filled message you set up.
How to Add WhatsApp Live Chat to WooCommerce Stores
Well, WooCommerce stores are powered by WordPress, so the process of integrating WhatsApp into a WooCommerce store is fairly similar.
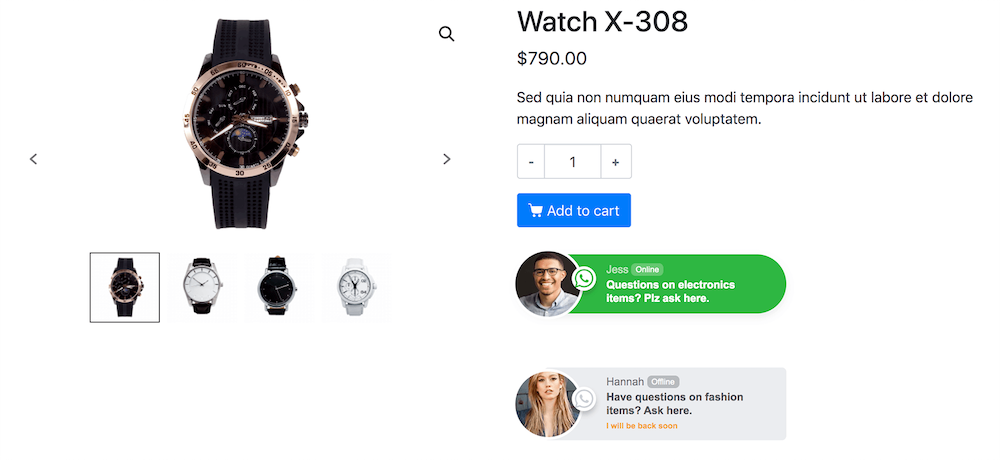
There are some additional benefits if you are using the WP Chat App plugin. It can add a WhatsApp button to key areas of your store’s pages, allowing customers to engage and make purchase decisions via live chat.
Once you have installed the plugin, you can display the WhatsApp click-to-chat button on WooCommerce single product pages. There are also four layouts to choose from defining where the button will be.
Go to Dashboard > WhatsApp. Now select a layout, and choose an account to display
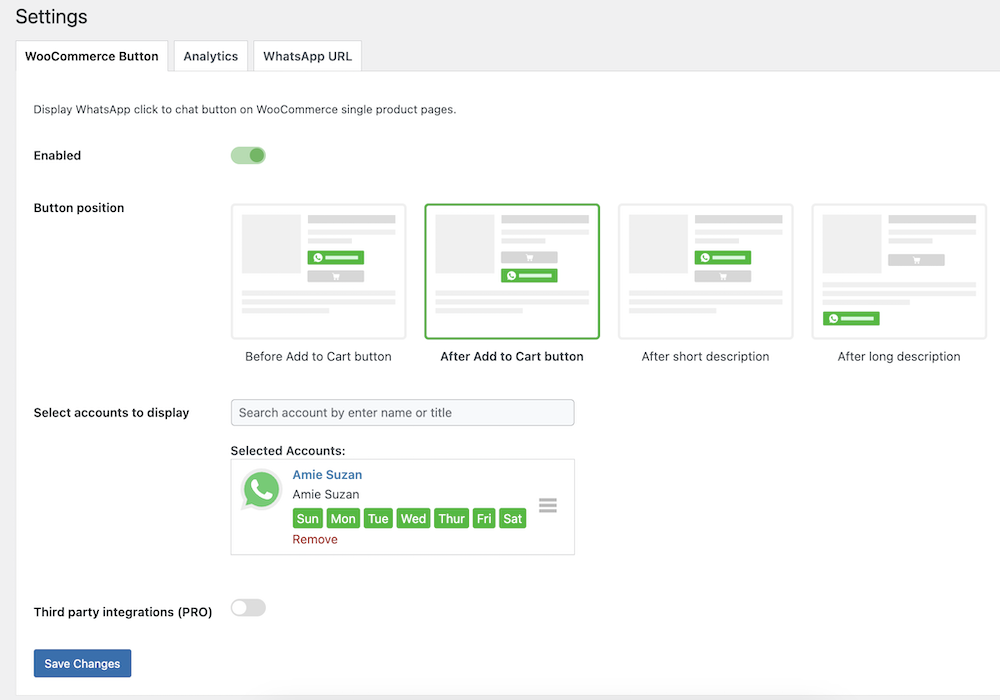
Save the changes by clicking on the “Save Changes” at the bottom.
Adding WhatsApp live chat to your WordPress site using the WP Chat App plugin is a smart way to enhance customer engagement and improve your support system. The plugin is highly customizable, easy to install, and offers a professional way to interact with your website visitors through WhatsApp.
How to Add WhatsApp Live Chat to WordPress Site Without Any Plugin
Yes, you can add a WhatsApp floating widget to your WordPress site without using a plugin by embedding a custom HTML and JavaScript snippet. Here’s a simple script you can use:
Add the code below to your WordPress site to add the WhatsApp WordPress site. Insert the following code just before the closing </body> tag or in the custom JavaScript section:
<!-- WhatsApp Floating Button -->
<a href="https://wa.me/1234567890" class="whatsapp-float" target="_blank">
    <img src="https://upload.wikimedia.org/wikipedia/commons/5/5e/WhatsApp_icon.png" alt="WhatsApp" />
</a>

<!-- Style for the floating button -->
<style>
.whatsapp-float {
    position: fixed;
    width: 60px;
    height: 60px;
    bottom: 40px;
    right: 40px;
    background-color: #25d366;
    color: #fff;
    border-radius: 50px;
    text-align: center;
    font-size: 30px;
    box-shadow: 2px 2px 3px #999;
    z-index: 1000;
}

.whatsapp-float img {
    width: 100%;
    height: 100%;
    object-fit: contain;
}
</style>
Replace 1234567890 with your WhatsApp number in the href attribute in this format: wa.me/<your_number>. Make sure to include the country code without any + or – symbols. This code creates a floating WhatsApp icon that links to your WhatsApp number when clicked.
You can change the button’s position by adjusting the bottom and right values in the CSS. If you want a custom image or icon, you can replace the image URL in the src attribute with any image URL. This method is lightweight and doesn’t require any plugins, ensuring faster load times for your site.
By providing instant communication options, you can improve your customer service, address inquiries in real time, and potentially increase conversions. Follow the steps above, and you’ll have WhatsApp live chat up and running on your WordPress site in no time. If you’re looking for a live chat plugin other than WhatsApp, check out our list of the best live chat plugins for WooCommerce and WordPress.