Do you want to add additional content to WooCommerce emails? Follow our step-by-step guidelines to add additional content to your WooCommerce transaction emails.
Whether you’re aiming to add a special thank-you note, promote related products, or share important updates, customizing your transaction emails can significantly enhance your customer experience.
In this guide, we’ll show you how to add additional content to your WooCommerce transaction emails in just 3 easy steps. Elevate your email communication and ensure that every message you send reflects your brand’s unique voice and values.
Where to Add Additional Content in WooCommerce Emails
WooCommerce has 10+ emails by default, you can add additional content to each of these emails individually. Here are the WooCommerce emails you can add additional content to.
- New Order
- Cancelled Order
- Failed Order
- Order On-Hold
- Processing Order
- Completed Order
- Refunded Order
- Customer Invoice
- Customer Note
- Password Reset
- New Account
How to Add Additional Content to WooCommerce Emails
Adding additional content to WooCommerce emails is easy. We are going to use Email Customizer for WooCommerce – Virfice plugin for this. Because, apart from adding additional content, you can also customize WooCommerce emails, send, test emails, add social media icons, and do many more.
So, Let’s get started.
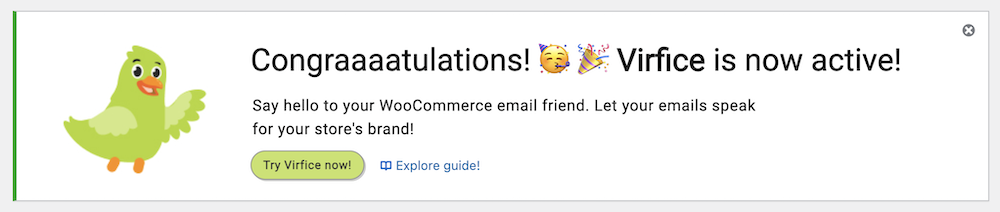
Step 1: Install and Activate the Plugin
If you haven’t already installed the Email Customizer for WooCommerce – Virfice plugin, install the plugin just like the way you install any other WordPress plugin.
Go to your WordPress dashboard. Navigate to Plugins > Add New. In the search bar, type Email Customizer for WooCommerce – Virfice.
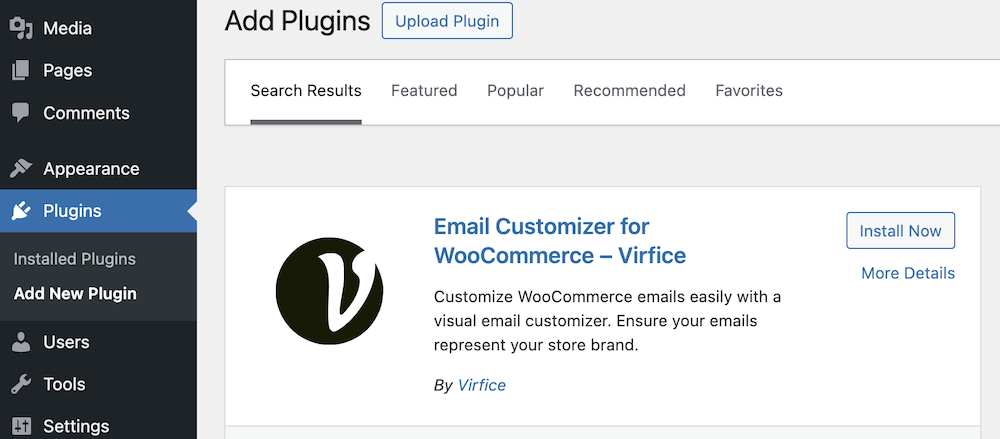
Click the “Install Now” button next to the “Email Customizer for WooCommerce – Virfice” plugin. Activate the Plugin: Once installed, click “Activate”.
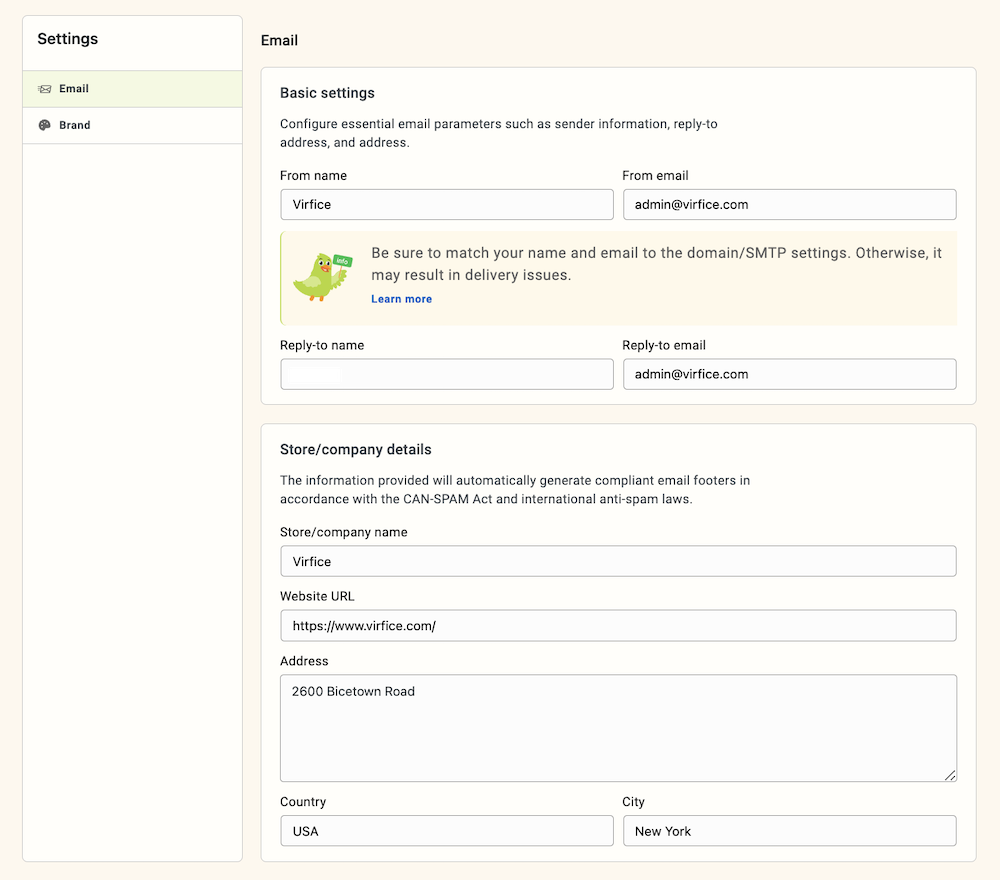
Step 2: Configure Necessary Settings
Once you have installed and activated the plugin, you must ensure you have set your emails correctly. The plugin automatically brings your default WooCommerce setup into the plugin settings.
Go to your Dashboard > Virfice > Settings, and you will find the Emails and Brand tabs, click on each tab and make necessary changes to the configuration.
Step 3: Add Additional Content to WooCommerce Emails
After setting up your email configuration, you can add content to any of the WooCommerce emails. To do that, go to your Dashboard > Virfice > Emails, you will find all WooCommerce emails here. Click on the WooCommerce emails if you want to add additional content.
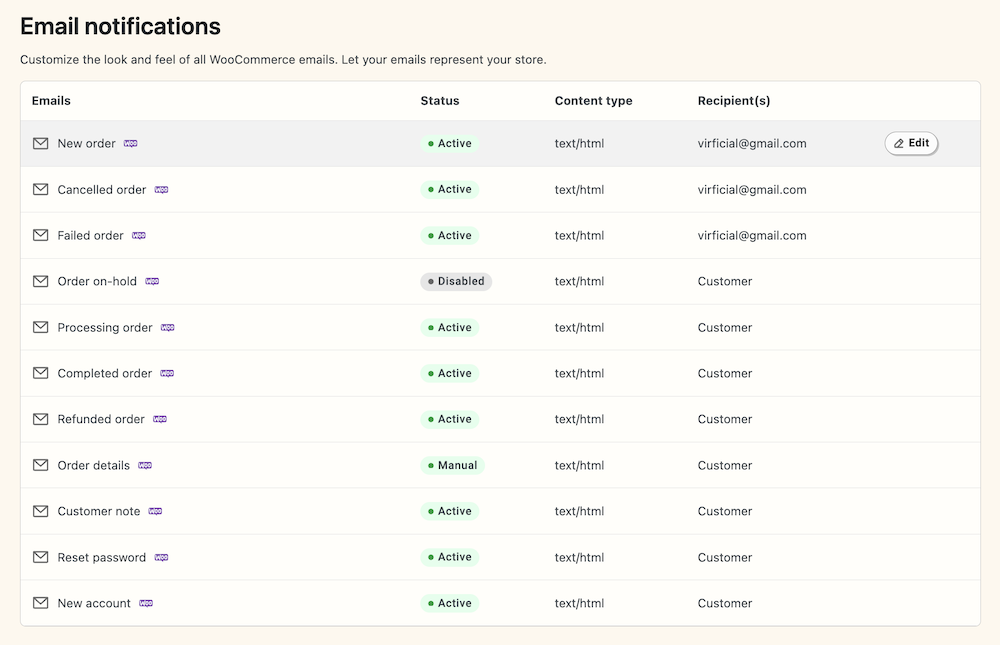
In our case, we are going to add additional content to the WooCommerce new order email.
So, click on the “New Order” email.
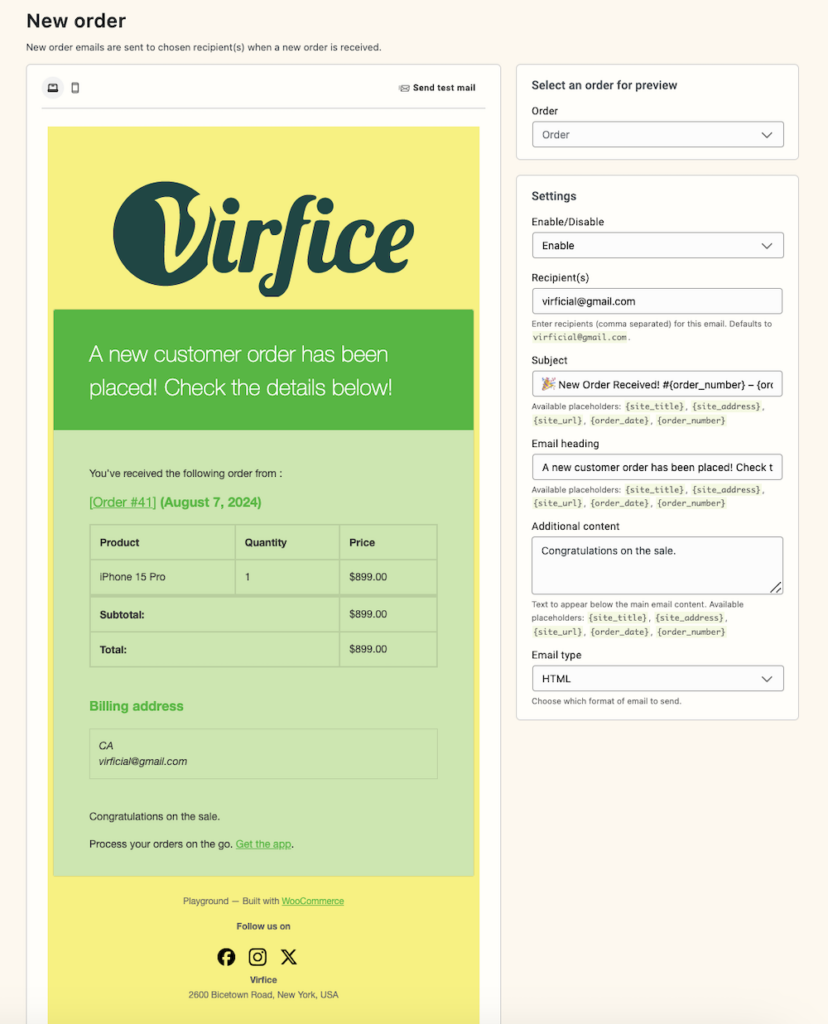
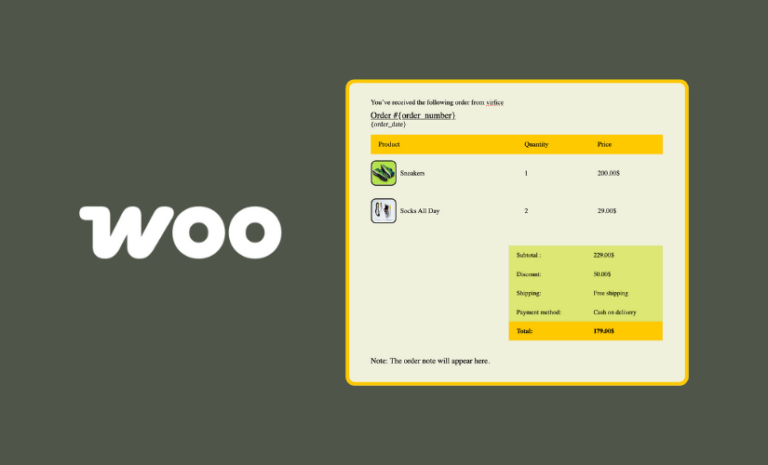
Here, you can add footer text, add social media icons, and add additional content to WooCommerce complete order email.
Scroll down and find “Additional content” on your right, place your content here and it will be displayed in your email.
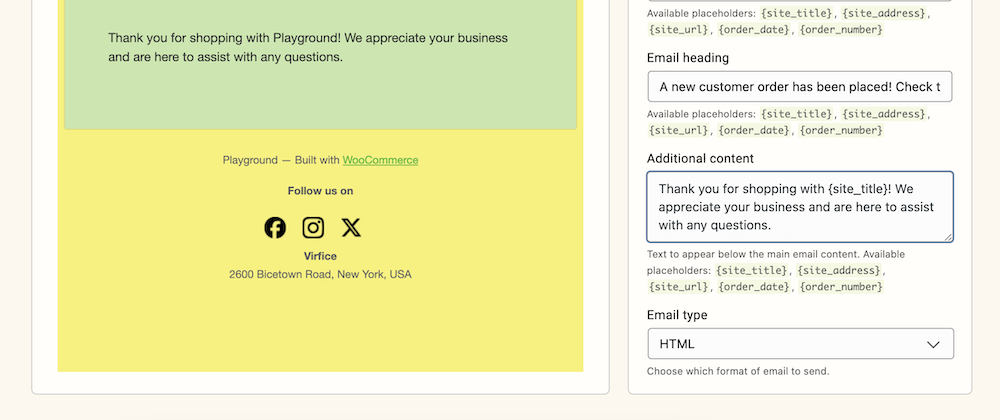
Click “Save” at the top to save the changes to make it work.
Step 4: Send a Test Email
To ensure that everything is working as expected It’s a good idea to send a test email to see if the content is being displayed in customers’ emails.
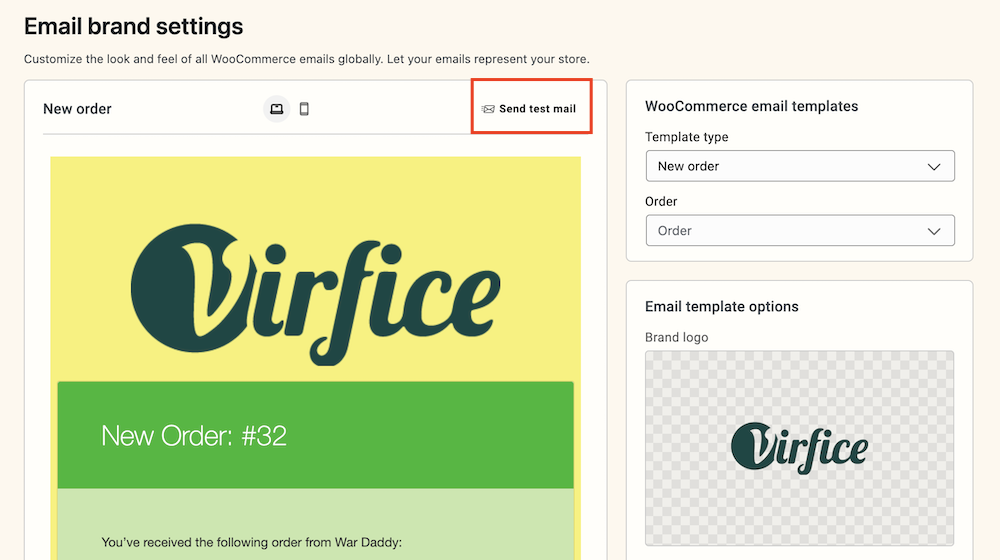
Go to email brand settings again (Dashboard > Virfice> Settings. Now click on “Brand”. Now click on “Customize”).
Now select the email type on your right panel and click on “Send test email”
A modal window titled “Send test email” will appear. In the “Recipients” field, enter the email addresses to which you want to send the test email. Separate multiple email addresses with commas.
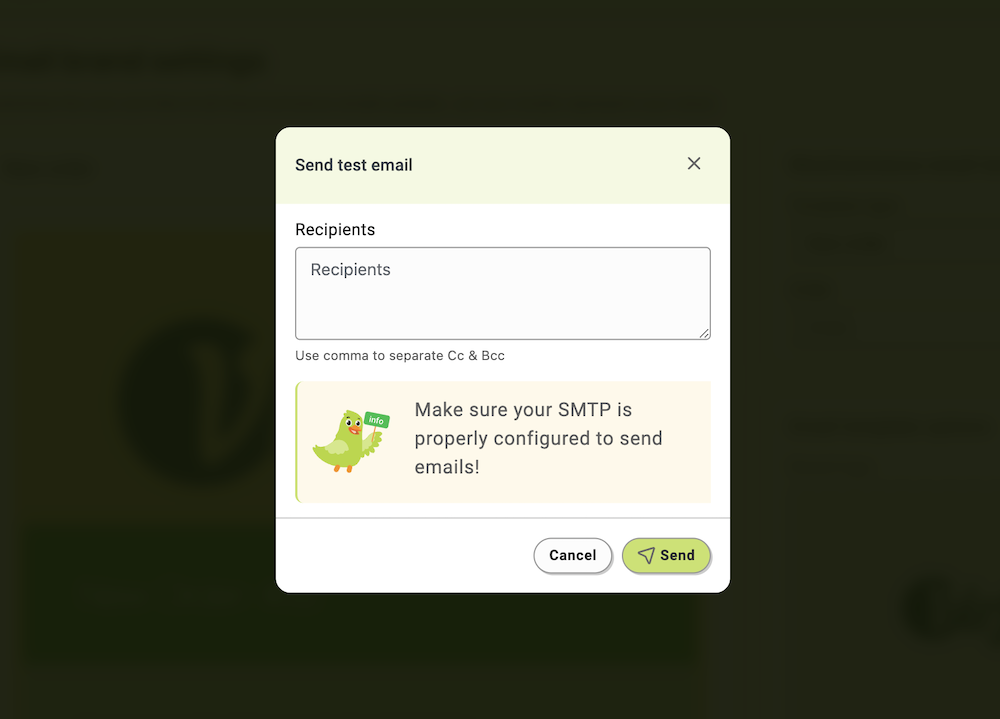
After entering the email addresses, click the “Send” button.
Note: You need to make sure your SMTP is properly configured to send emails!
By following these simple steps, you can easily personalize your WooCommerce transaction emails to better engage your customers and reinforce your brand identity. Whether you’re adding a heartfelt thank-you note, highlighting related products, or sharing important updates, customizing your emails ensures that your communication resonates with your audience. This not only helps build stronger customer relationships but also provides an opportunity to share valuable information and promote your offerings. Start enhancing your transaction emails today, and make every interaction with your customers count!