Want to block visitors on WordPress sites with IP addresses? If you want to disallow specific users or IP addresses from accessing your website, follow our tutorial to get this done easily.
You may often want certain IP addresses to be blocked from accessing your WordPress site. Banning visitors from accessing your site is required when you suspect users of hacking from a specific IP address. Also, you may not want your websites to be accessible from certain IP addresses.
Whatever the reasons, if you want to block visitors on WordPress sites with IP addresses, you can easily do that by following our guide. So, let’s get started
Benefits of Blocking Visitors with IP Addresses
Banning visitors with IP addresses comes with some use cases.
- Enhanced Security: Blocking suspicious or known malicious IP addresses can prevent unauthorized access, hacking attempts, or attacks on the website. It can potentially secure your website.
- Protection from bots: It helps reduce the impact of automated bots or scripts that might be used for spamming, scraping content, or launching denial-of-service (DoS) attacks.
- Prevention of malicious activities: Blocking certain IP addresses can mitigate risks associated with activities such as phishing, fraud, or spreading malware.
- Block Unwanted Visitors from Certain IPs: You may not want your website to be accessible from certain IPs. You can block those IPs if you want.
Apart from these, there are other reasons to block visitors with IP addresses from accessing your website.
How to Block Visitors on WordPress Sites With IP Addresses
You can block visitors on WordPress sites with IP addresses in different ways. One of the easy ways to do this is to use a security plugin. And, there are several security plugins available for WordPress that offer IP blocking features. One popular option is the “SolidSecurity” plugin. We will use this plugin to block visitors on WordPress sites.
Install and Activate SolidSecurity Plugin
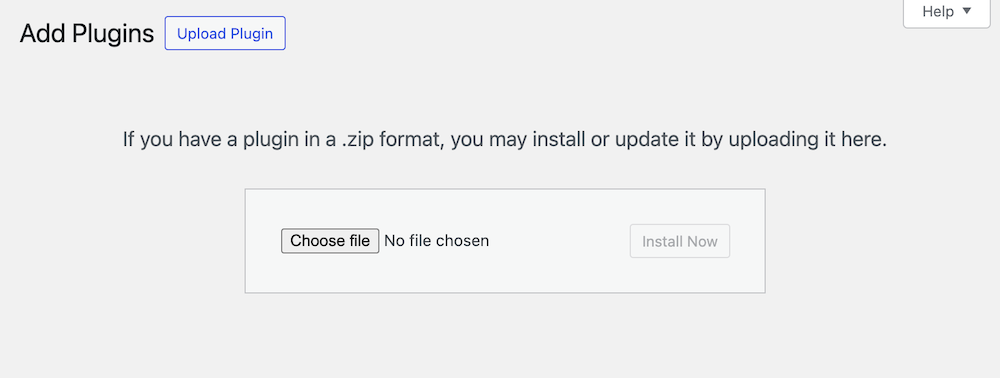
First, go to the SolidSecurity website to get the SolidSecurity plugin. Now, go to your WordPress dashboard > Plugins > Add New, install, and activate the plugin as you manually install any other WordPress plugins.
Ban User Agents With IP Addresses
Go to your WordPress Dashboard > Security > Features, click on Firewall, and enable “Ban Users”
Scroll down to “BAN USER AGENTS”, and now enter a list of user agents that will not be allowed access to your site.
Note: Add one user agent per line.
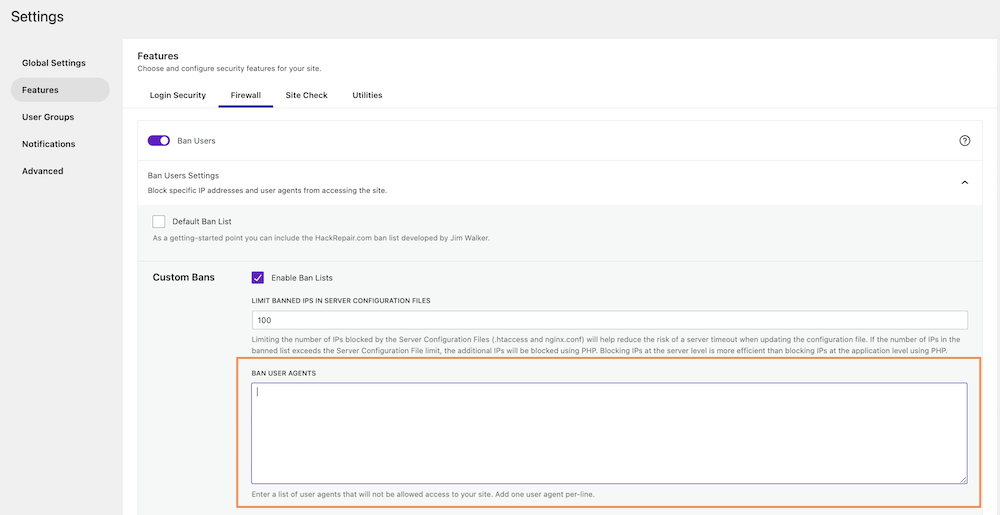
Save the changes at the bottom to make it work.
Limit Banned IPS in Server Configuration Files
To minimize the risk of server timeouts during configuration file updates, it’s advisable to restrict the number of IPs blocked within Server Configuration Files like .htaccess and nginx. conf. When the banned IP list surpasses the server configuration file limit, any excess IPs will be blocked via PHP. Opting for server-level IP blocking proves more efficient than relying on PHP for application-level IP blocking.
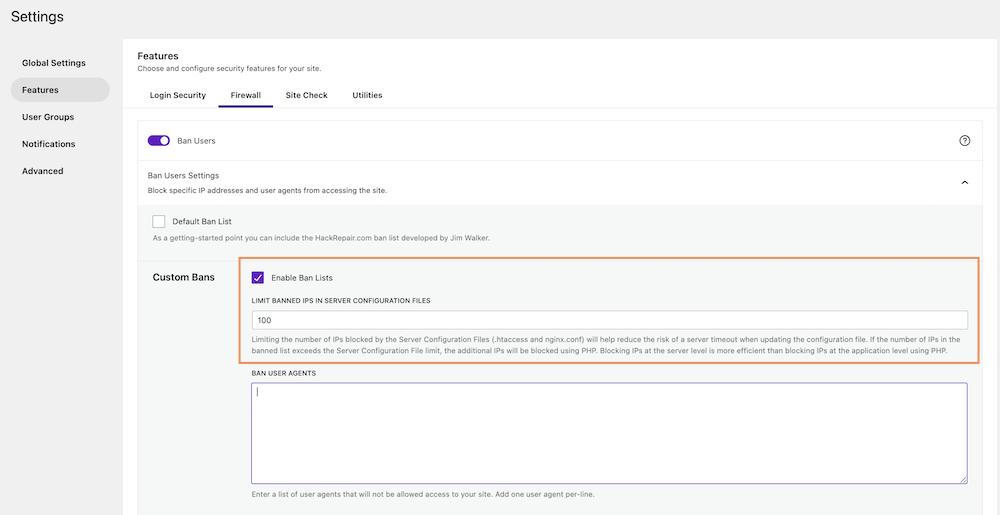
Go to your WordPress Dashboard > Security > Features, click on Firewall, and scroll down to “LIMIT BANNED IPS IN SERVER CONFIGURATION FILES”, Place the number of IPs you want to ban using server configuration. Save the changes once done.
Block Visitors if They Violate Firewall Rules
If visitors try to break that rule (like trying to access something they’re not supposed to), you can limit how many times they can try before they get kicked out and can’t try again for a while.
Go to your WordPress Dashboard > Security > Features, click on Firewall, Enable “Firewall Rules Engine”
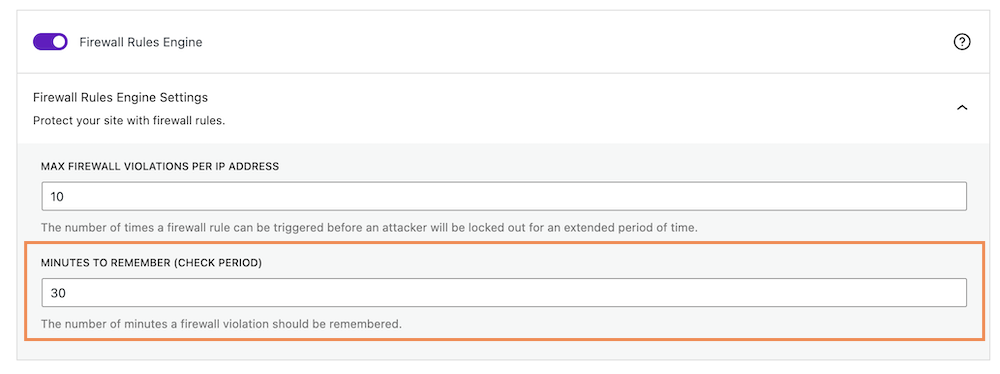
Now under the “Firewall Rules Engine Settings”
Give the number in the box to decide how many times you want to allow that before banning a user.
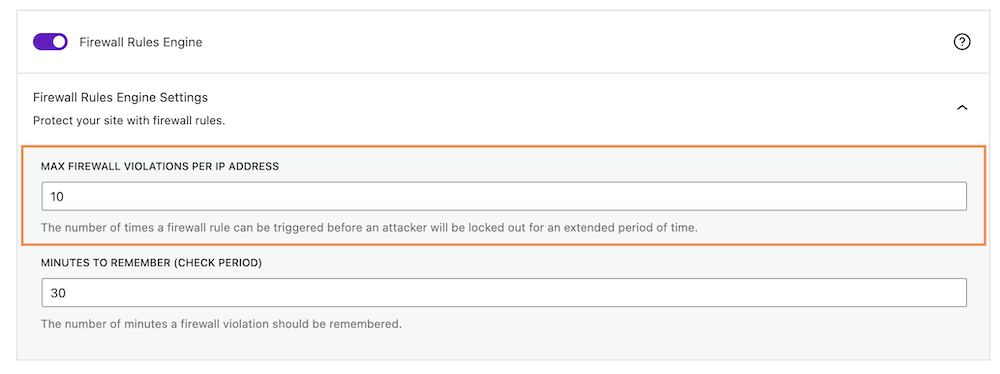
Also, you can decide the number of minutes a firewall violation should be remembered by giving the minutes in the box.
How to Block Visitors on WordPress Sites With IP Addresses Without a Plugin
If you want to block visitors on WordPress sites with IP addresses without a plugin, you can edit the .htaccess file. You can block IP addresses directly through the .htaccess file: Access your website files via FTP or file manager provided by your hosting provider. Locate the .htaccess file in the root directory of your WordPress installation.
Edit the .htaccess file and add the following lines:
order allow,deny
deny from xxx.xxx.xxx.xxx
deny from yyy.yyy.yyy.yyy
deny from zzz.zzz.zzz.zzz
allow from all
Replace xxx.xxx.xxx.xxx with the IP address you want to block.
Save the changes to the .htaccess file. And you are done.
You may want to block visitors from accessing your website in certain cases. If you want to block visitors on WordPress sites with IP addresses, this tutorial should help achieve that. For more of such helpful tutorials, visit our site regularly.


