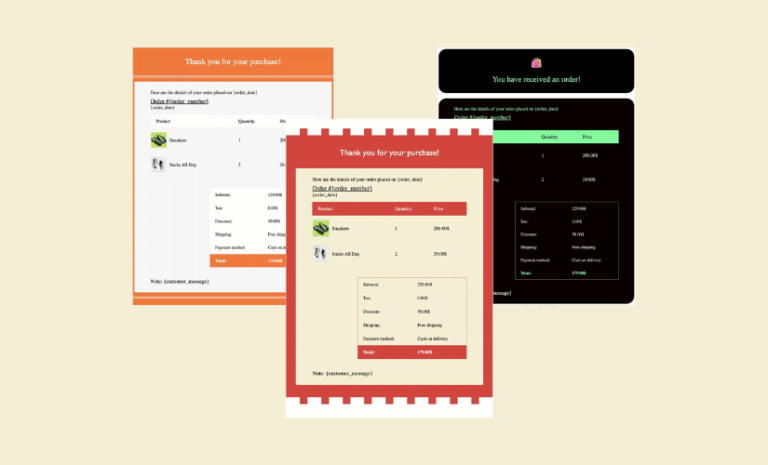
Do you want to customize WooCommerce emails for your store? You have come to the right place. We will show you how to edit WooCommerce emails, such as orders, refunds, invoice processing, and other transaction emails, easily.
You must communicate with your customers once they purchase a product from your store. Email is the major means of communication in this case. WooCommerce has transaction and order emails by default. But these emails require customization to represent your store better. You may need to add some extra information to these emails. Whatever the reason, today, we will show you how to customize WooCommerce emails in a few steps.
eCommerce transaction emails have a much higher open rate than any marketing email. Customizing them by changing color adding images, or changing content would help you present your store better and make communication with your customers smooth.
WooCommerce has built-in options to customize WooCommerce emails with some limitations. That’s why we will use a plugin (Email Customizer for WooCommerce – Virfice) to customize WooCommerce emails. You can change WooCommerce email templates by changing the colors, adding a logo, and changing the content inside the email body. Let’s know how to edit WooCommerce emails for orders, refunds, and complete orders.
What Are the WooCommerce Emails to Customize?
WooCommerce has 11 default transaction emails to send to your customers at different stages of purchase. You can send an email when someone confirms an order, when someone cancels an order, and on many other occasions.
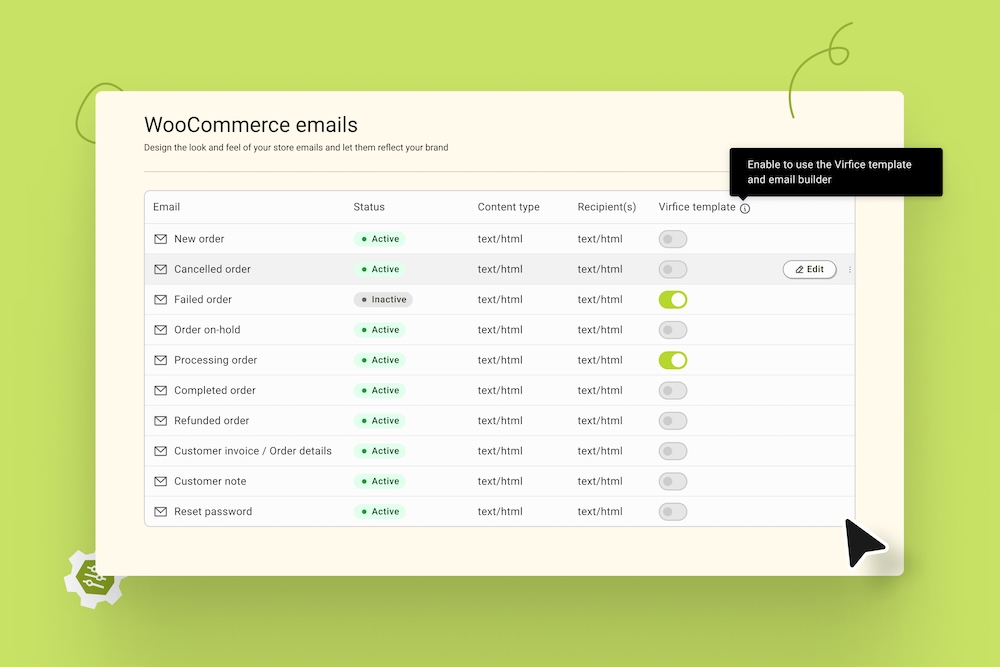
Here is the list of the WooCommerce transaction emails you can send from your store.
- WooCommerce New Order Email: Email sent to the store admin to notify them of the new order.
- WooCommerce Canceled Order Email: This email is sent to the store admin to notify them of a canceled order.
- WooCommerce Failed Order Email: This email is sent to the store admin to notify them of a failed order.
- WooCommerce Order On-Hold Email: Email sent to customers with details if their order is placed on hold.
- WooCommerce Order Processing Email: Email sent to customers after payment completion; contains order details.
- WooCommerce Order Completed Email: Email sent to customers when their orders are marked completed; indicates that the order has been shipped.
- WooCommerce Order Refunded Email: This email is sent to customers when an order is refunded.
- WooCommerce Customer Invoice Email: Email sent to customers; contains order information and payment links.
- WooCommerce Customer Note Email: This email is sent when a customer note is added to the dashboard.
- WooCommerce Password Reset Email: Email sent to a customer after they request to reset their password.
- WooCommerce New Account Email: Email the customer when they create an account.
With the default options of WooCommerce, you can customize all these transaction and order emails, their subjects, headings, body content, and template design with colors.
How to Customize WooCommerce Emails Easily
After you set up your store, customizing WooCommerce emails is probably the next most important thing you should do. WooCommerce has default options to customize WooCommerce transaction emails like new orders, orders on hold, completed orders, and more.
There are many ways you can customize WooCommerce emails. We will use Email Customizer for WooCommerce – Virfice for easier customization. It is a free WordPress plugin built exclusively for WooCommerce emails.
Before everything, let’s watch the video on how Virfice helps you customize WooCommerce emails!
Install Email Customizer for WooCommerce – Virfice
First, install Email Customizer for WooCommerce – Virfice on your store. Go to your Dashboard > Plugins> Add New. Now search “Virfice” in the search box and hit install when you see Email Customizer for WooCommerce – Virfice.
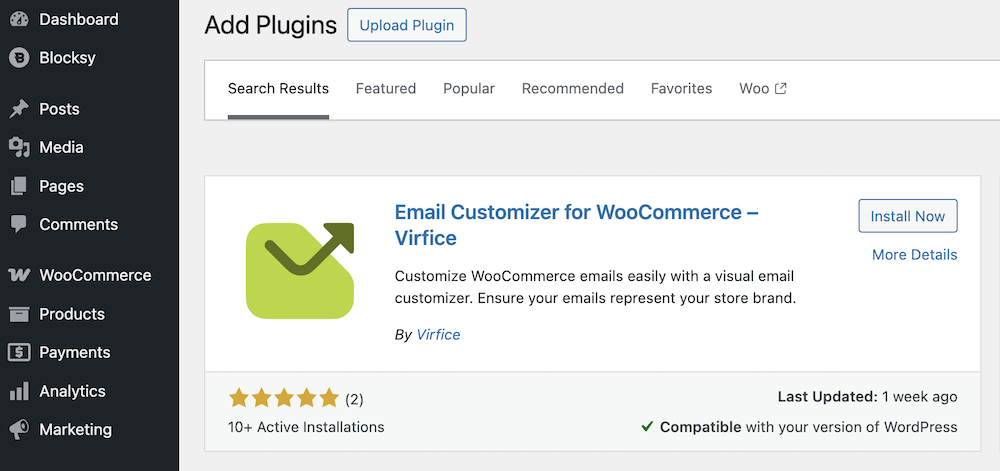
Activate the plugin subsequently once installed.

Customize WooCommerce Email Templates
Once you are logged into your store dashboard, go to Virfice > Emails. You will see the list of all transaction emails there.

Add WooCommerce Email Sender Details
The email sender’s name and the email sender’s address are two crucial information to send emails from a store. Go to Virfice > Settings > Email. You will see from the name and from the email fields.
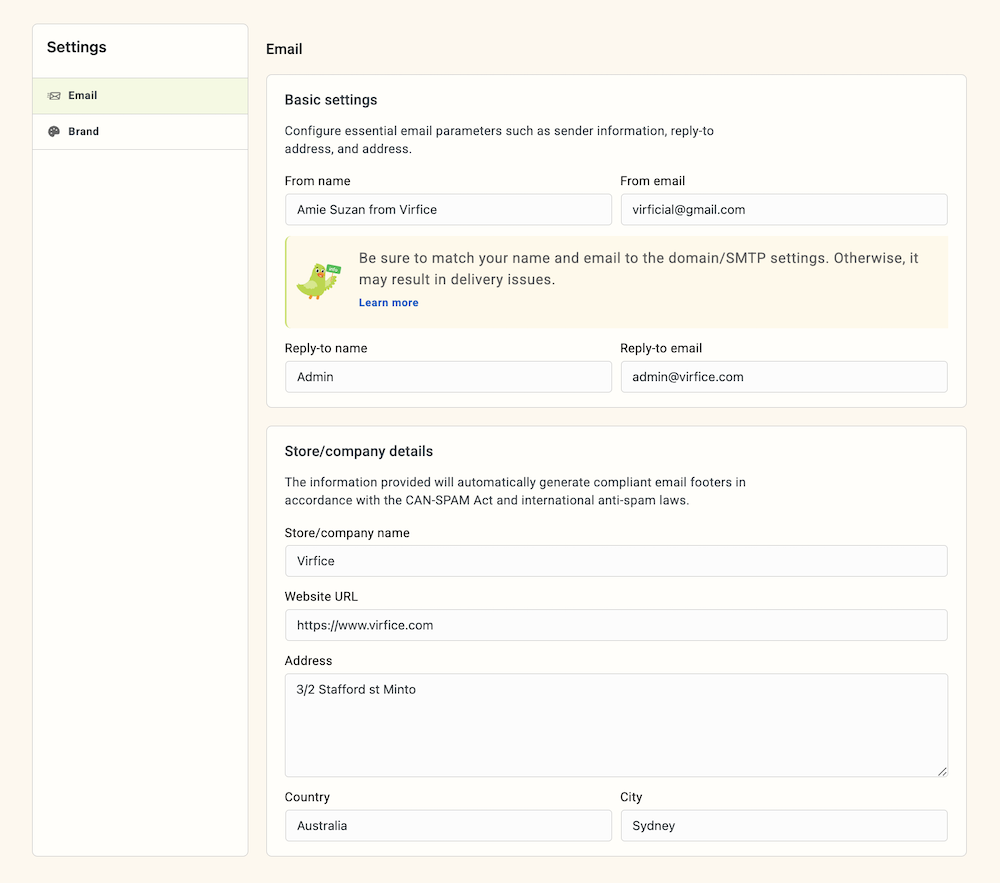
Add the sender’s name in the form name field. Use something users will instantly recognize, like your store name. If you want to give it a human feel, you can add something like John Doe from My Store. [Your name] from [your store].
Also, place the email address in the email address field. Save the changes by clicking “Save” at the top.
Note: Be sure to match your name and email to the domain/SMTP settings. Otherwise, it may result in delivery issues.
Add Reply-to Email Address to WooCommerce Emails
You can also add a reply-to email address to WooCommerce emails. If you want your Reply-to email to be different from the sender email, you can do that with Email Customizer for WooCommerce – Virfice too.
Go to Virfice > Settings > Email. You will see reply-to name and reply-to email fields. Fill out the fields and save the changes to make it work.

Customize Brand Settings Globally
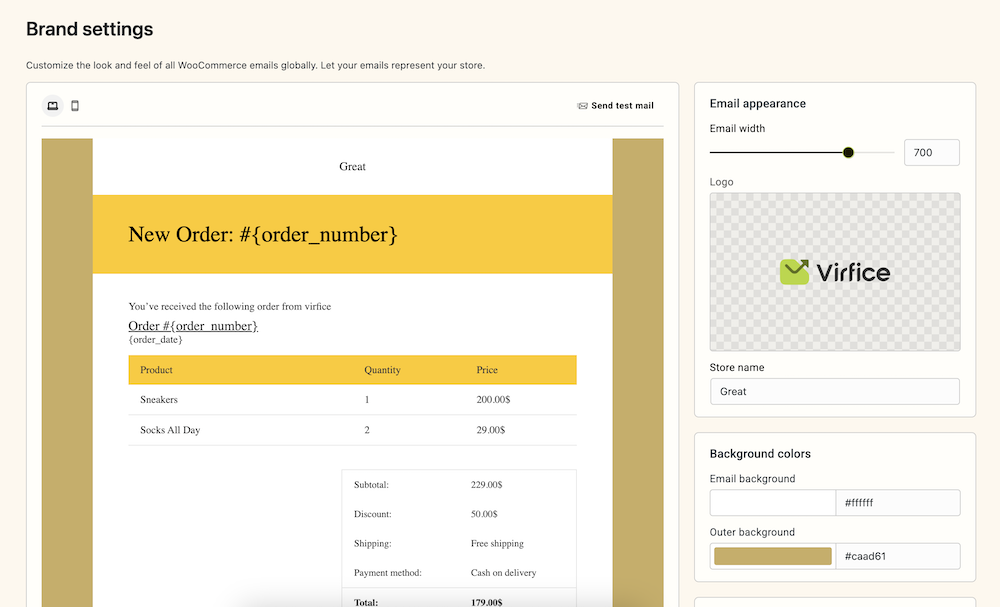
In the Virfice plugin, you can customize the global look and feel of your WooCommerce emails using the global brand settings.
Go to Virfice > Settings > Brand and click on Customize. This will take you to the global brand settings.
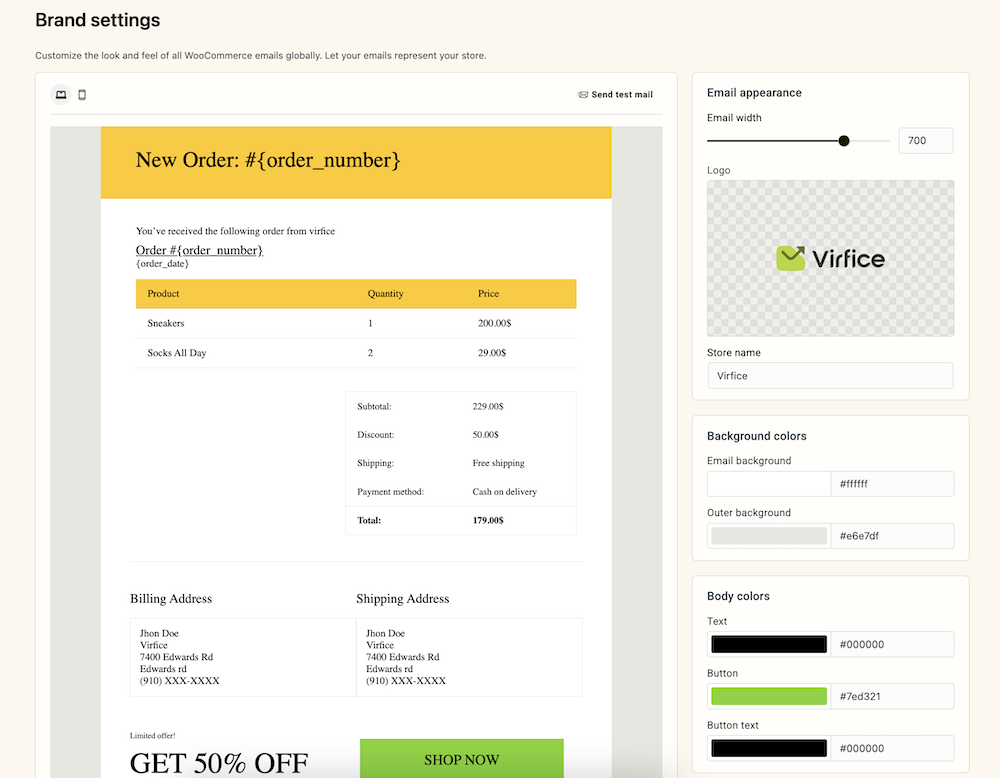
Here, you can:
- Upload a header logo
- Select colors for the inner and outer email background
- Define the email width
- Choose colors for other email elements globally
Once you’re done, save the changes.
Customize WooCommerce Emails
Once you have configured the settings and customized the global brand, it’s time to customize WooCommerce emails individually.
Go to Virfice > Emails and open one of the 11 WooCommerce transactional emails you want to design. Let’s start with the Processing Order email.
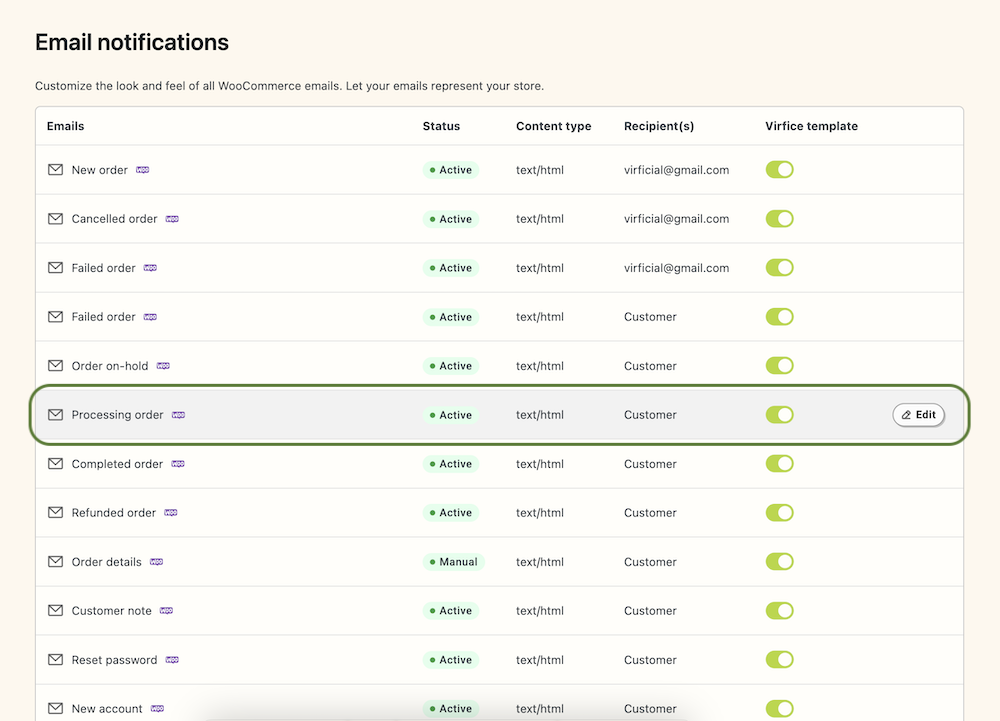
Before clicking Edit, make sure you have enabled the Virfice template. This will allow you to use the Virfice template and email builder to design WooCommerce emails.
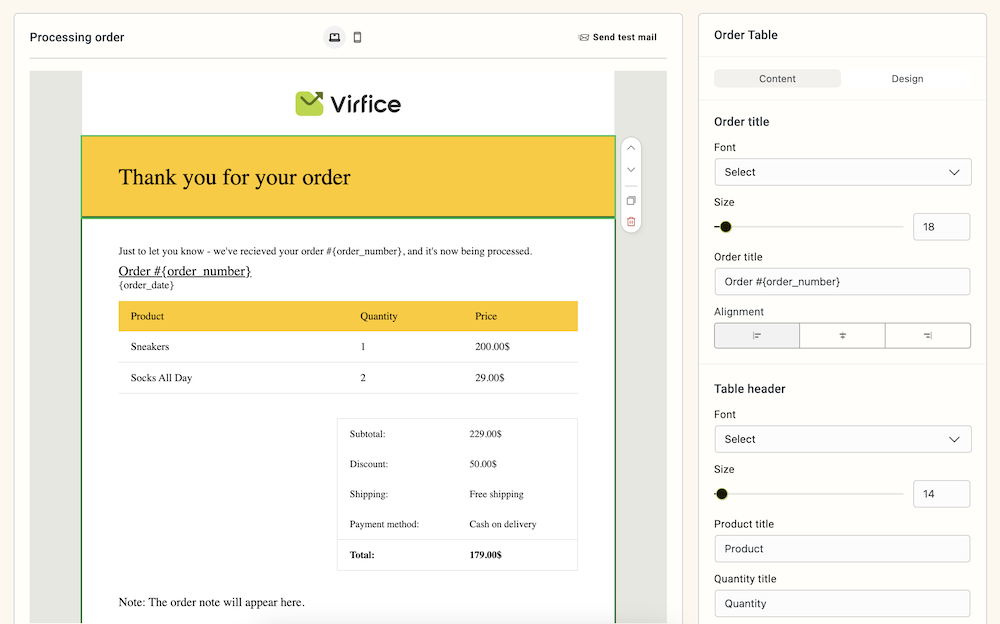
Once you are in the email editor, you will see a look of your new order email that you have set from the global brand settings. Also, there is default content for a new order email.
Add a Header to Your WooCommerce Emails
You can add a header to enhance branding and professionalism. A well-designed header can include various elements, creating a consistent brand experience for customers. With simple customization, you can make your emails visually appealing and more engaging, boosting customer trust and recognition. Virfice Email Builder offers multiple header variations to match your needs.
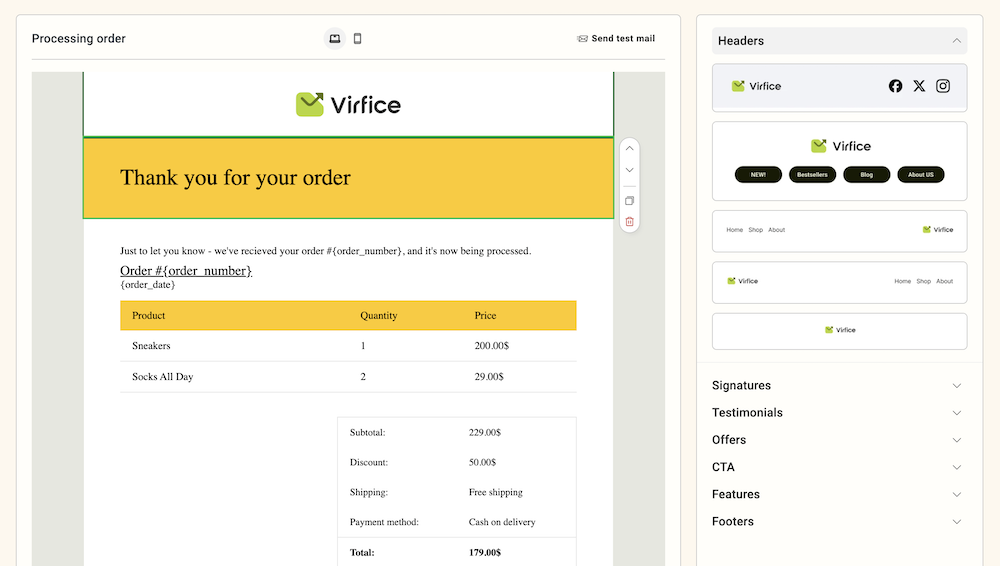
Click on “Ready Blocks” in the Virfice Email Builder, then select “Header” from the right-side panel. Choose your preferred header from the available options.
Add Additional Content to Your WooCommerce Emails
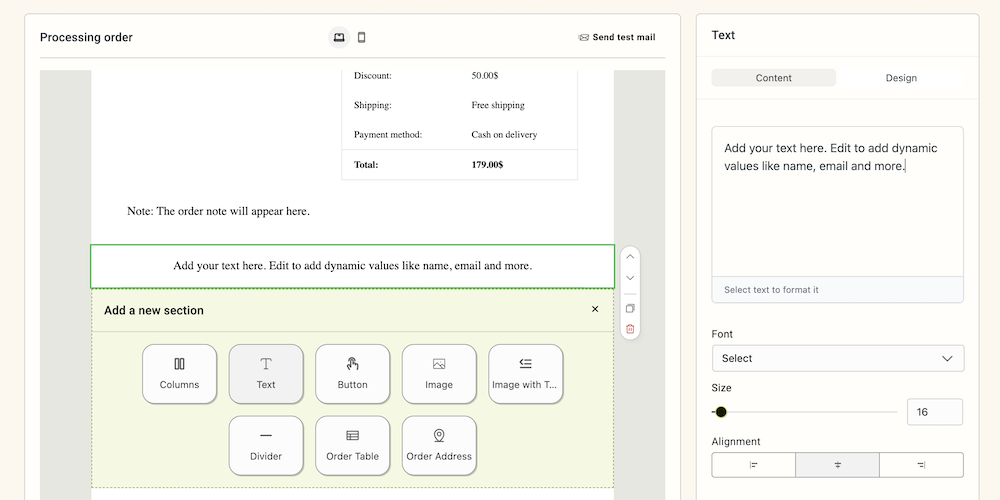
If you need additional content to convey any message to your customers, you can do that by adding content by taking a text element.
Add a Signature to Your WooCommerce Emails
You can add a signature to personalize your WooCommerce emails and enhance credibility. A well-crafted signature can include your name, designation, and contact details, creating a professional touch. Virfice Email Builder offers multiple signature variations to match your needs.
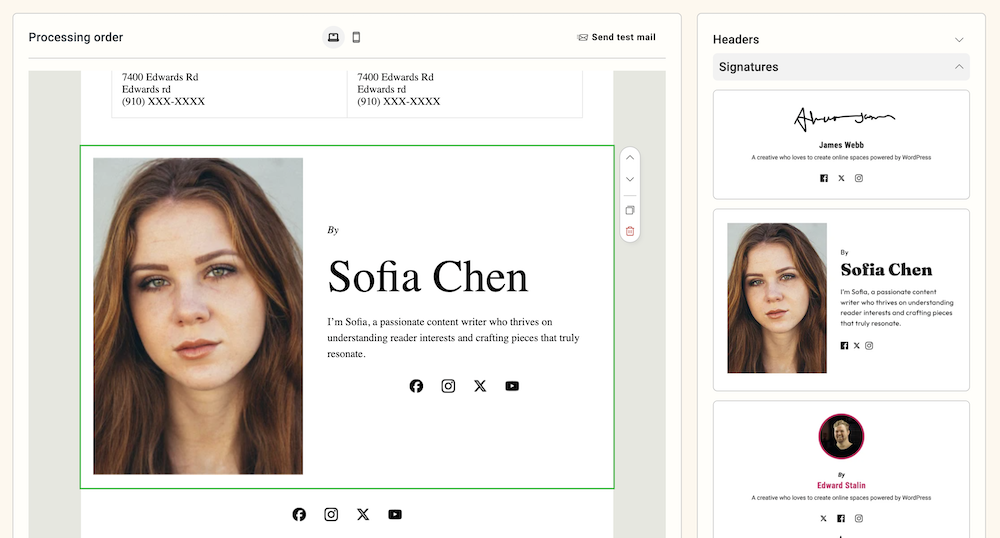
Click on “Ready Blocks” in the Virfice Email Builder, then select “Signatures” from the right-side panel. Choose your preferred signature from the available options.
Add a Testimonial to Your WooCommerce Emails
You can add a testimonial to your WooCommerce emails to build trust and social proof. Featuring positive customer feedback helps reinforce credibility and encourages new customers to take action. With a well-placed testimonial, your emails become more persuasive. Virfice Email Builder offers multiple testimonial variations to fit your brand’s style.
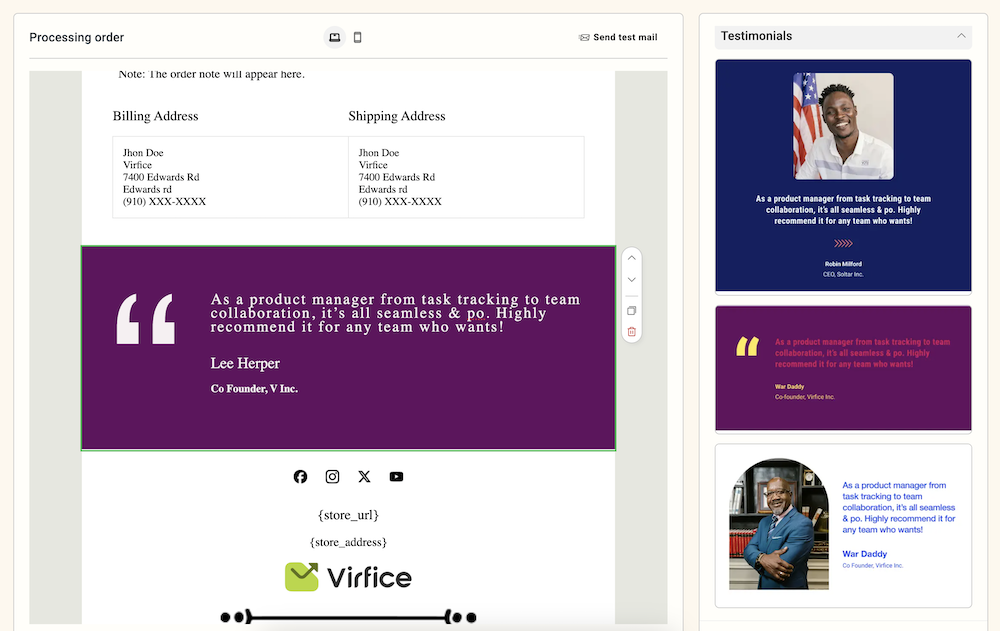
Click on “Ready Blocks” in the Virfice Email Builder, then select “Testimonials” from the right-side panel. Choose your preferred testimonial from the available options.
Add A Footer to WooCommerce Emails
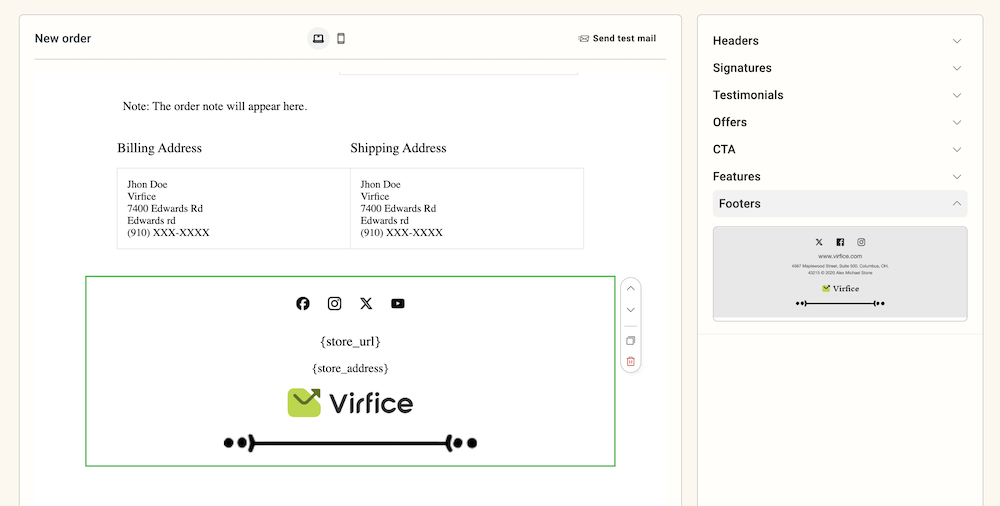
Add a footer to your WooCommerce emails to provide essential information and enhance professionalism. Virfice Email Builder offers multiple footer variations to match your branding and communication needs.
Click on “Ready Blocks” in the Virfice Email Builder, then select “Footers” from the right-side panel. Choose your preferred footer from the available options.
Change WooCommerce Email Template Colors for Individual Email
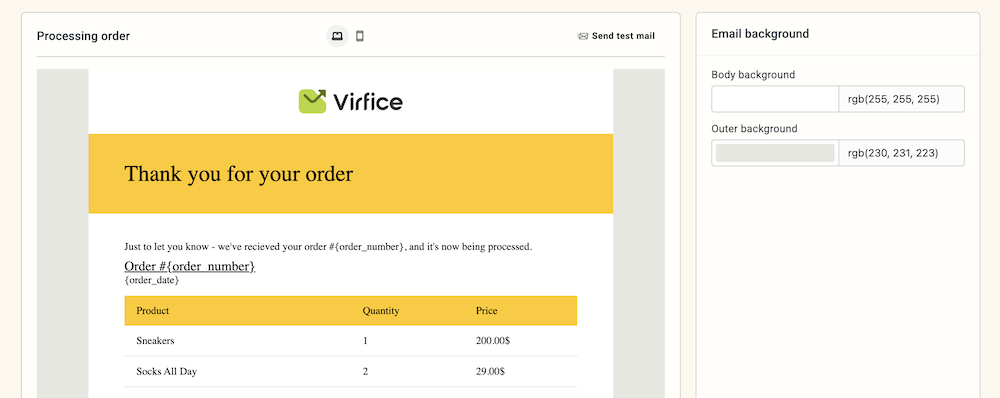
While you can set the color for all WooCommerce email templates globally, you also have the flexibility to design each email differently. You can customize the email background and outer background color to match your specific needs.
Click on the outer area of your email, and you will see the “Email Background” options on the right panel. Change the colors for both the email and outer background, then save the changes. This way, you can make each email visually distinct from the others.
How to Preview WooCommerce Emails
If you have changed the options stated above and picked the right colors for your WooCommerce emails, you are done with the customization. Now, you need to preview the WooCommerce template you just have customized.
Previewing WooCommerce emails with Virfice does not require many actions as desktop and mobile previews are already there while you customize the template or make changes to any individual emails.
While you are customizing any email, you can see the desktop and mobile icon at the top to preview the WooCommerce emails of your choice.

How to Send Test Emails for WooCommerce Emails
Once you have customized emails, you can send test emails to your preferred email address to see how users will see them in their inbox.
While you are on email brand settings or customizing any individual emails, click on “Send Test Email” at the top right of your email.
You will see a popup to enter your preferred email addresses to receive test emails. You can add multiple emails, separated by commas. Once added, click on the send button. You should receive your test emails if you have set things correctly.
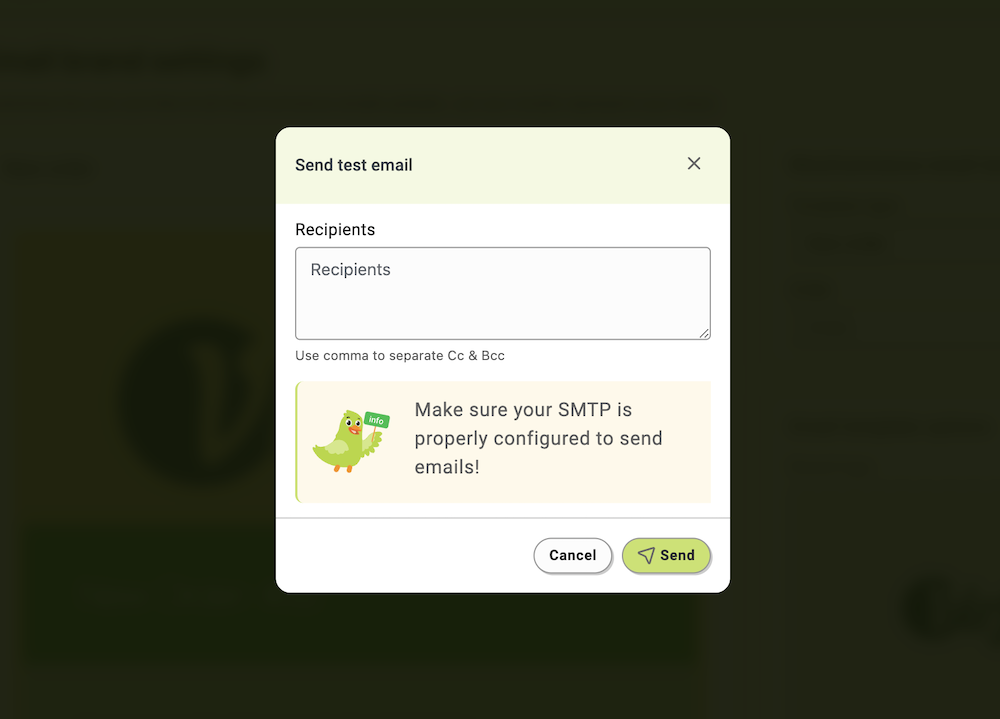
Note: You need to make sure your SMTP is properly configured to send emails!
You need to customize WooCommerce emails to represent your store so that customers can easily relate when you send an email. Virfice has options and a system to customize WooCommerce order emails. You can change the look and feel of WooCommerce order emails, refund emails, or any other emails you send to your customers from your store. Customize WooCommerce emails with Virfice and stand out with your store brand.


