Getting Started With Virfice
Overview

Email Customizer for WooCommerce – Virfice is an email solution exclusively made for WooCommerce. It makes email communication with your customers and builds a better relationship with them. You can customize all default WooCommerce transaction emails by changing colors, editing content, adding footer text, uploading a store logo to your WooCommerce emails, and many more.
Also, you can preview emails on both desktops and mobile devices and send test emails to your preferred email address.
System Requirements
Virfice is built for WooCommeerce. You need to have a minimum WooCommerce and WordPress version required to work properly.
We always keep our plugin compatible with the latest version of WordPress and WooCommerce. It is important to make sure you meet the minimum system requirements to use Virfice.
- WordPress: 6.5
- WooCommerce: 9.0.2
- PHP: 7.2
- Theme: Use the latest and regularly updated theme
- SMTP: You need to have your SMTP configured before sending emails.
Installation Guide
Installing Virfice is just like any other WordPress plugin you generally install. Like other WordPress plugins, it can be installed manually by downloading from the WordPress directory and also from your WordPress site dashboard.
Method 1: Install “Virfice” from your WordPress site Dashboard
You can easily install the Virfice plugin from your WordPress dashboard.
Go to your WordPress Dashboard > Plugins > Add New Plugin. Search “Virfice” and find “Email Customizer for WooCommerce | Virfice” and click on “Install Now”.
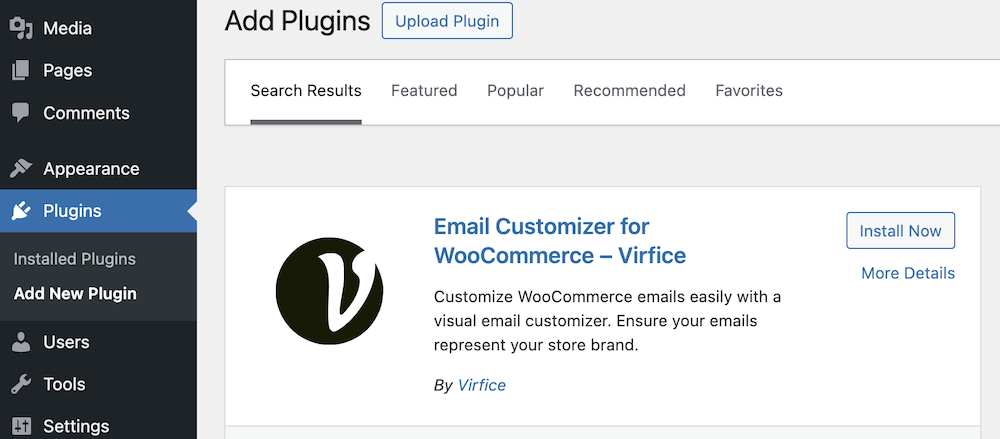
Activate once the installation is done. Congratulations! You have successfully installed the Virfice plugin on your website.

Method 2: Manual installation
To install Virfice manually on your WordPress site, download the plugin from the WordPress plugin directory. Click here to download Virfice (the plugin file comes in the name of emails-for-woocommerce.zip).
Alternatively, you can go to the WordPress plugin directory, search “Virfice” and click on download on the Virfice plugin landing page. (The plugin file comes under the name emails-for-woocommerce.zip).
Go to your WordPress Dashboard > Plugins > Add New Plugin, and click on “Upload Plugin”.
Upload the downloaded emails-for-woocommerce.zip file and click on “Install Now”
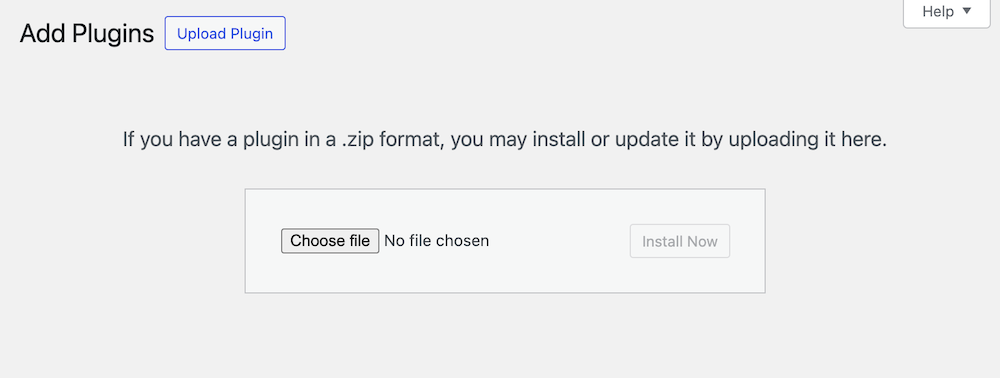
Activate the plugin once the installation is done. Congratulations! You have successfully installed the Virfice plugin on your website.

Dashboard Overview
Virfice is an email solution exclusively made for WooCommerce. Virfice dashboard offers easy navigation to all important pages, editors, and settings of Virfice.

Brand Settings
The brand settings point to editable parts. This is where you can change the look and feel of your WooCommerce emails by customizing the design globally for all transaction emails.
Note: You need to have orders and products in your store to display content in emails. Please create dummy products and orders if you don't have them.
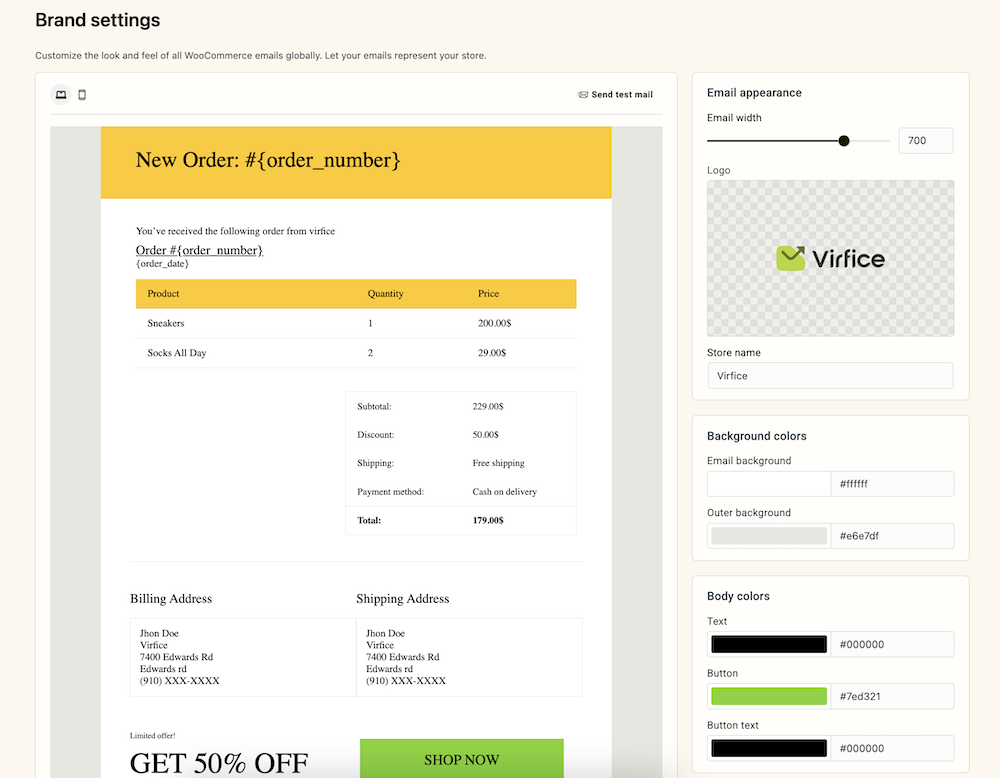
Here are some key changes you can make:
- Upload store logo
- Choose background color
- Choose body color
- Pick text Color
- Decide whether to have social media icons on the emails
Emails
Virfice lets you customize and manage all WooCommerce transaction emails from a single place. The Emails tab under Virfice has all the transaction emails.
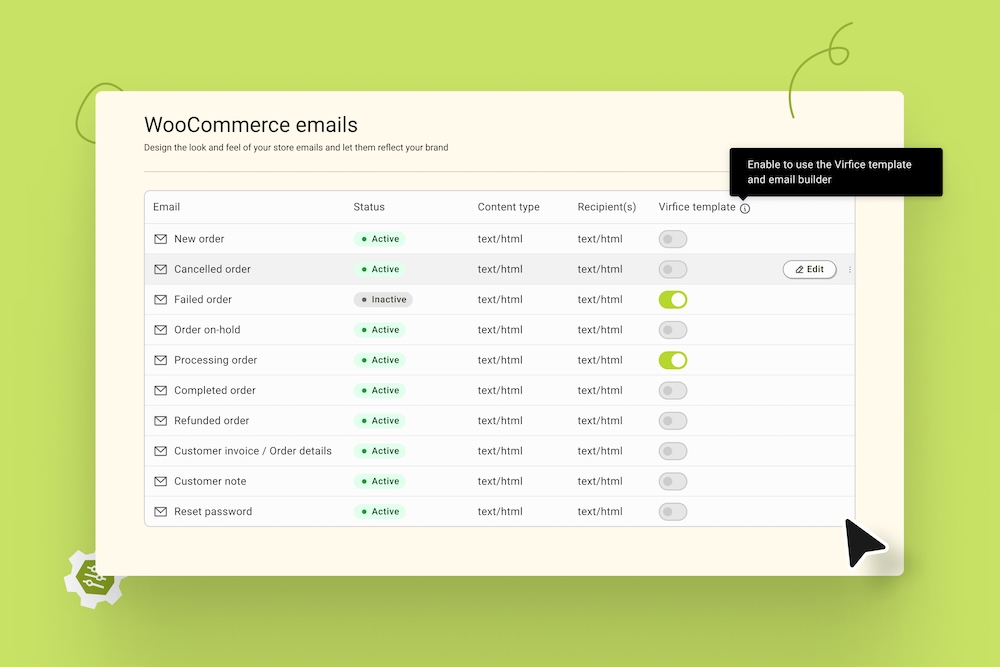
You can click on any email to customize or manage it from here.
Configuration
Emails
Here you have all the settings related to emails! It also has links to the guide to correctly configure your emails.
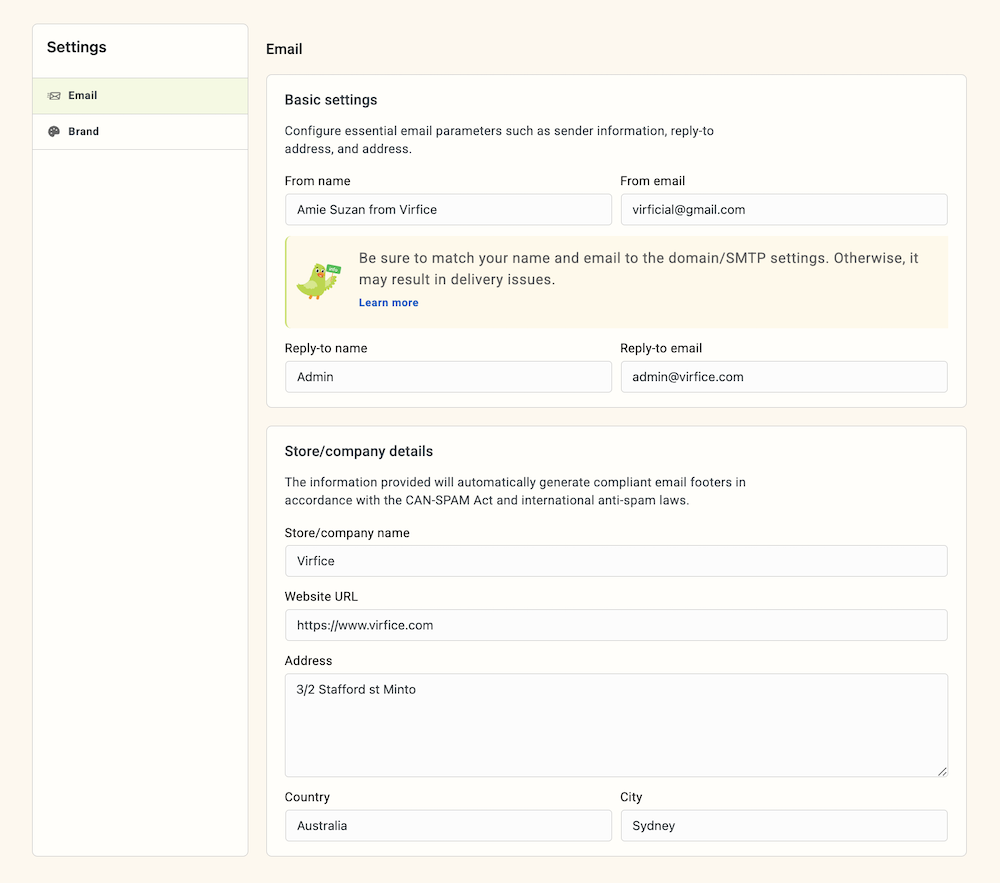
Basic Settings
In the Basic Settings section, you can configure essential email parameters such as sender information, reply-to address, and physical address. These settings ensure your emails are delivered correctly and comply with email standards.

From Name: Enter the name you want to appear in your email’s “From” field.
From Email: Enter the email address you want to use to send emails. Ensure this matches your domain/SMTP settings to avoid delivery issues.
Reply-to Name: Enter the name you want to appear in the “Reply-to” field.
Reply-to Email: Enter the email address to which you want replies to be sent.
Store/Company Details
The information provided here will automatically generate compliant email footers by the CAN-SPAM Act and international anti-spam laws.
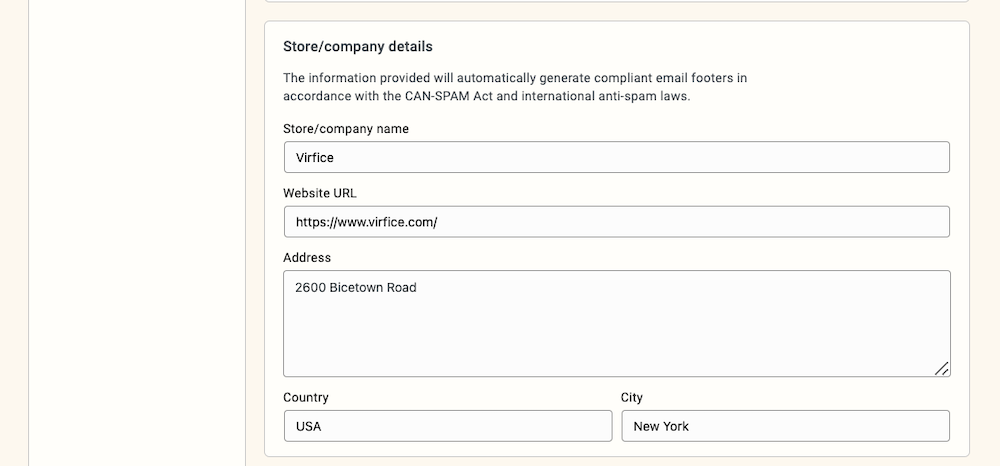
Store/Company Details: Enter the name of your store or company.
Website URL: Provide the URL of your website.
Address: Provide your physical address. This is required to comply with anti-spam laws.
Country: Select your country from the dropdown menu.
City: Select your city from the drop-down menu.
Transaction Emails

Transaction emails are automated messages sent to customers based on specific actions or events related to their orders and accounts. Below is a description of each transaction email available in the Virfice plugin.
New Order
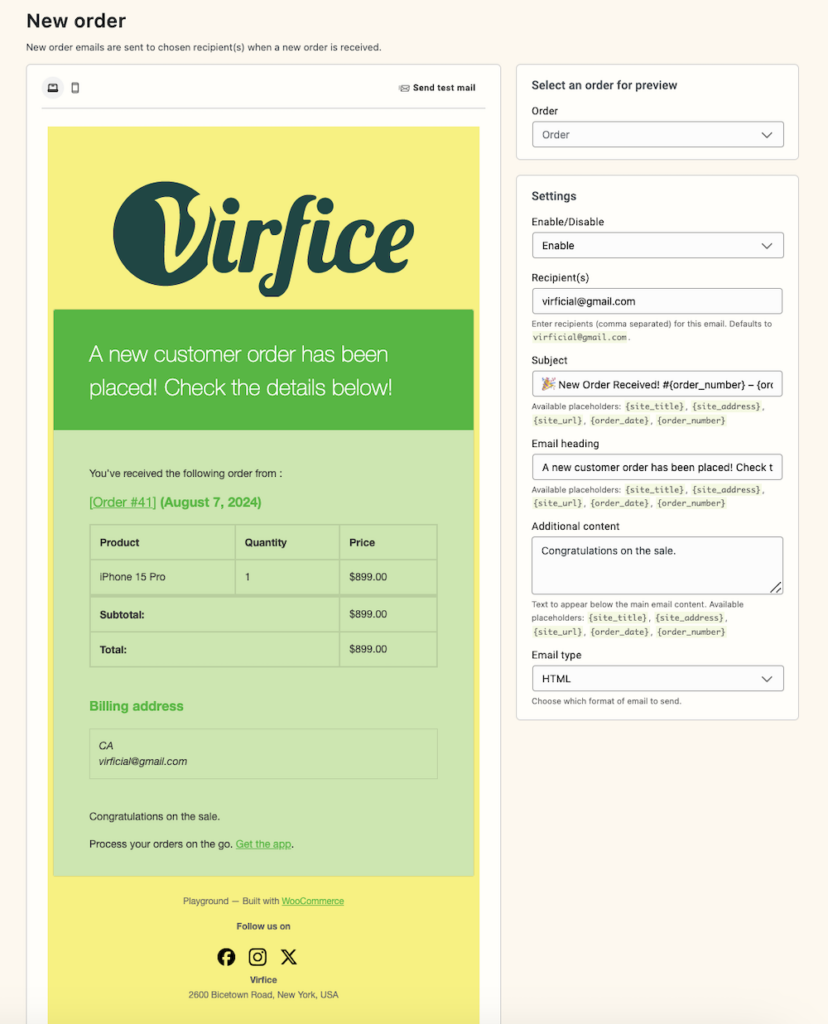
This email is sent to the store admin when a new order is placed. It contains order details including customer information, products ordered, and payment method.
Cancelled Order
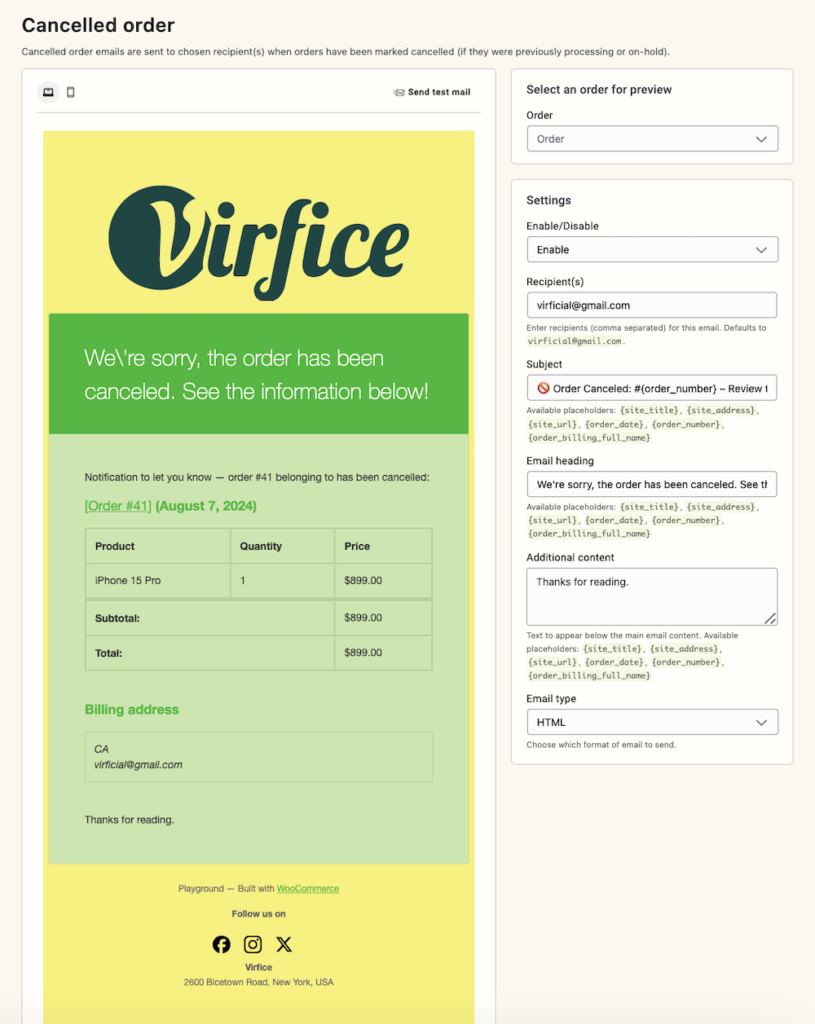
This email is sent to the customer and store admin when an order is canceled. It includes the order details and the reason for cancellation if provided.
Failed Order
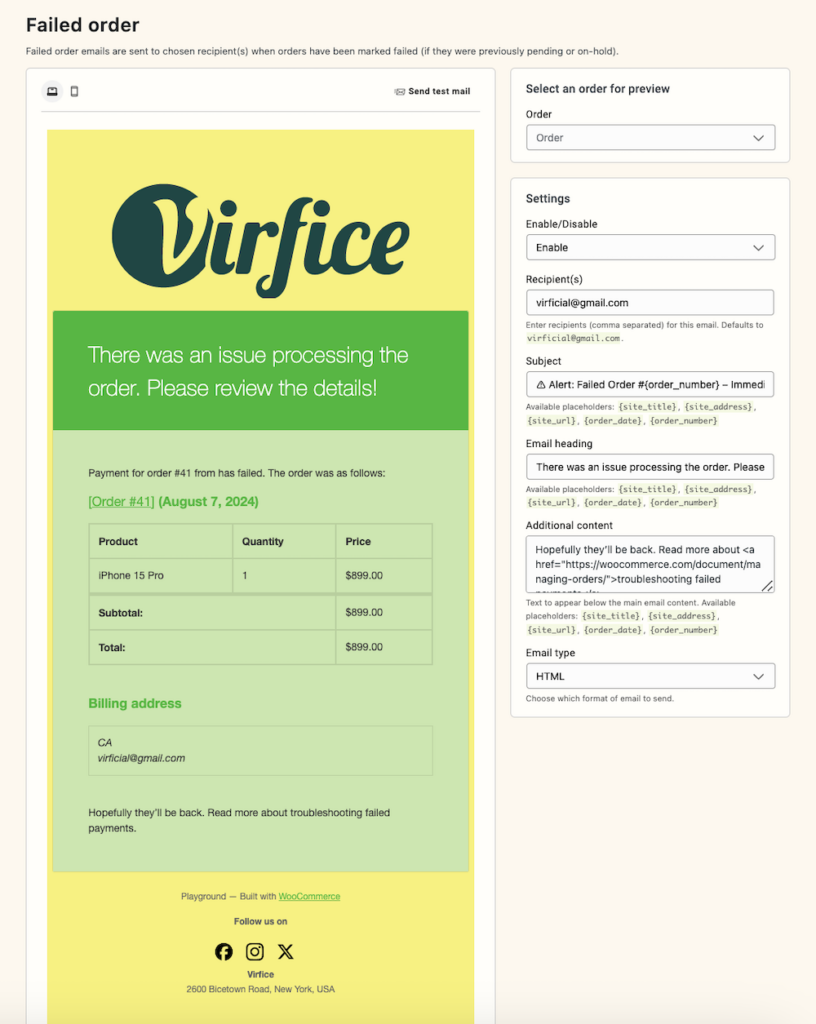
This email is sent to the store admin when an order has failed. It includes the order details and information about why the order failed.
Order On-Hold
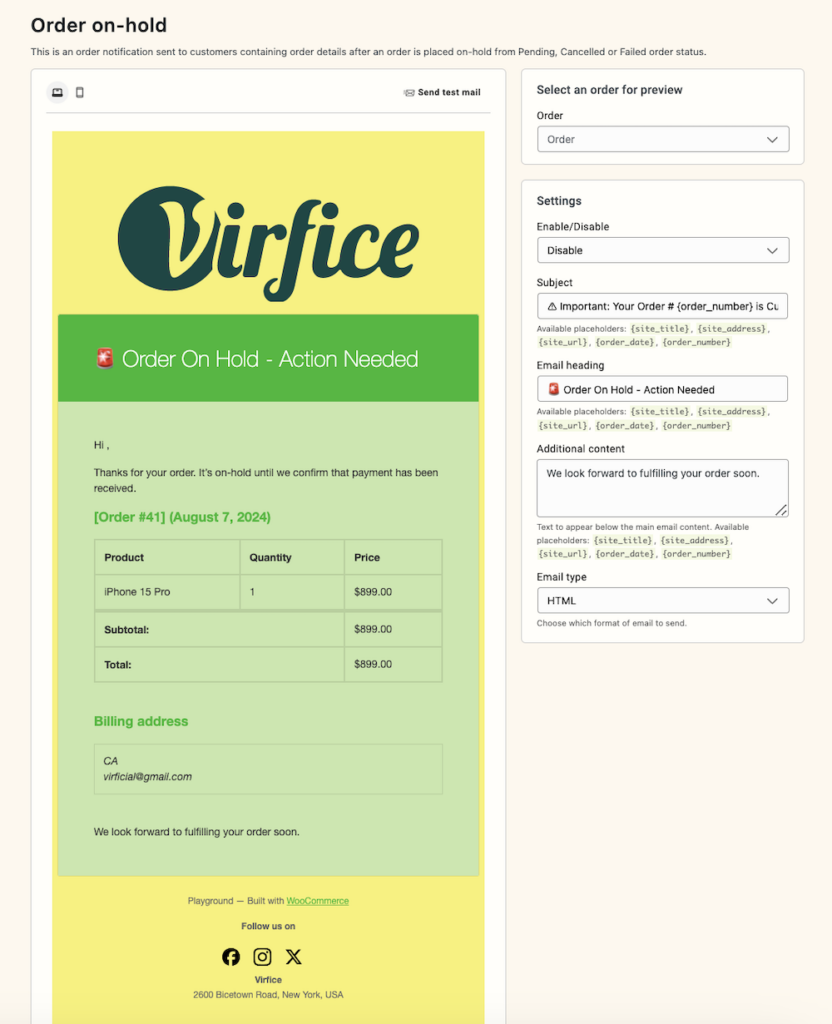
This email is sent to the customer when their order is placed on hold. It includes the order details and any necessary actions the customer needs to take to resolve the hold status.
Processing Order
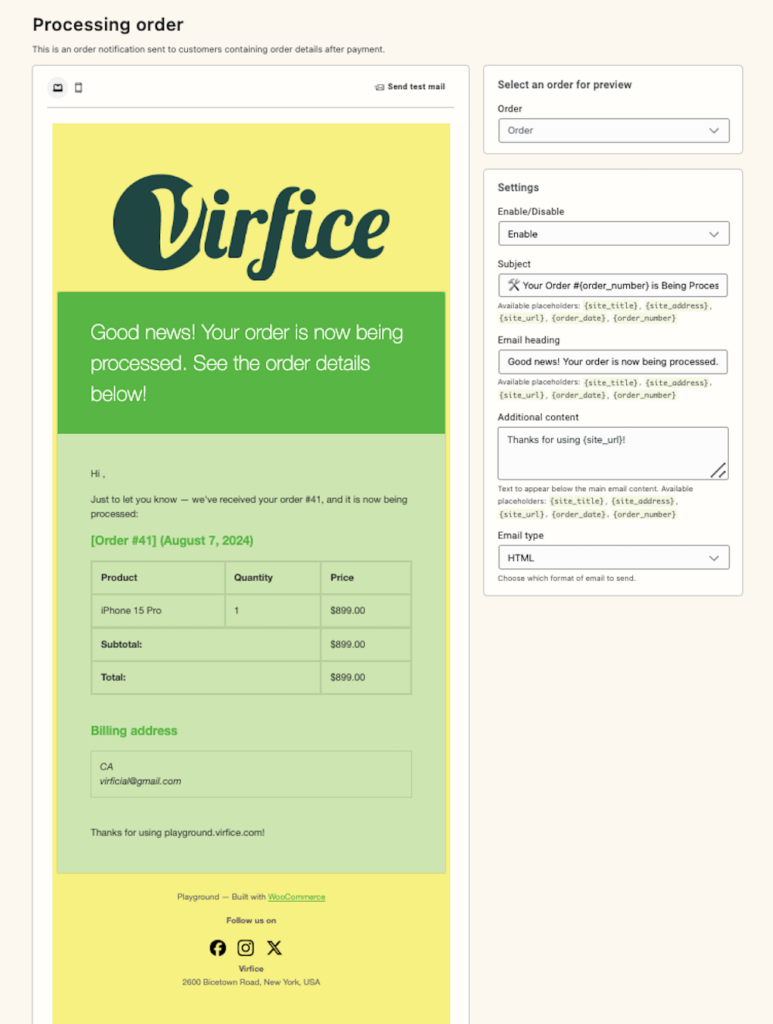
This email is sent to the customer when their order is being processed. It includes the order details and an estimated shipping date.
Completed Order
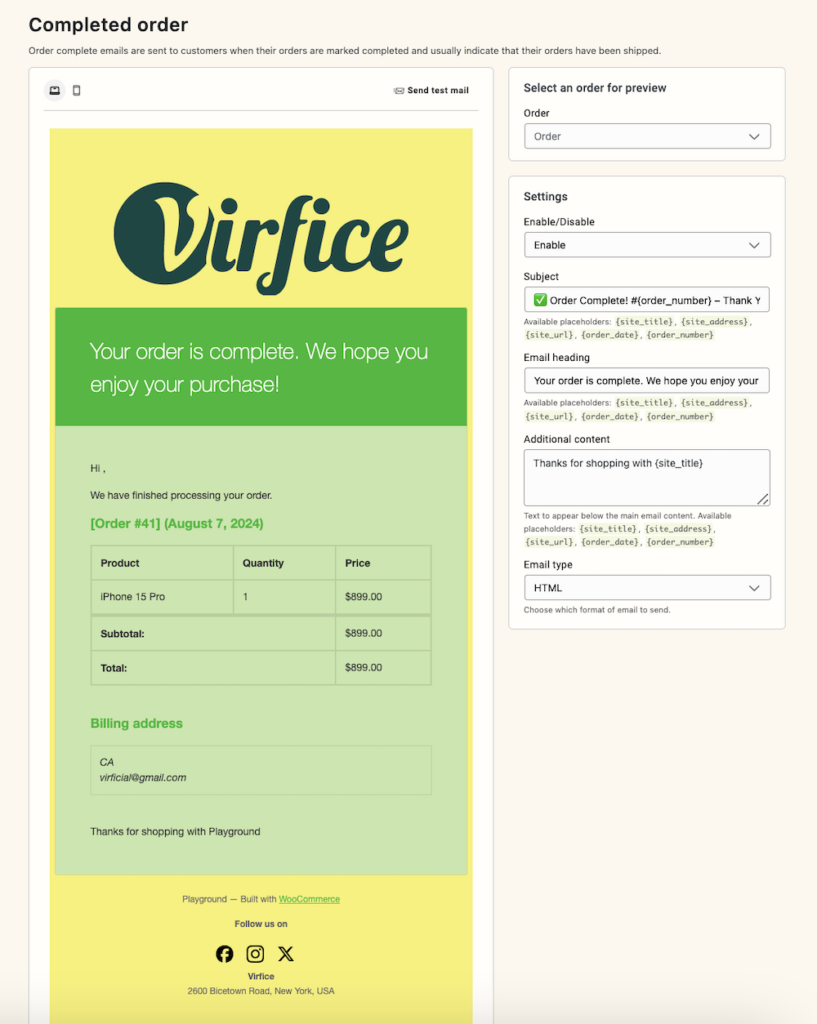
This email is sent to the customer when their order is marked as completed. It includes the order details and confirmation of shipment or delivery.
Refunded Order
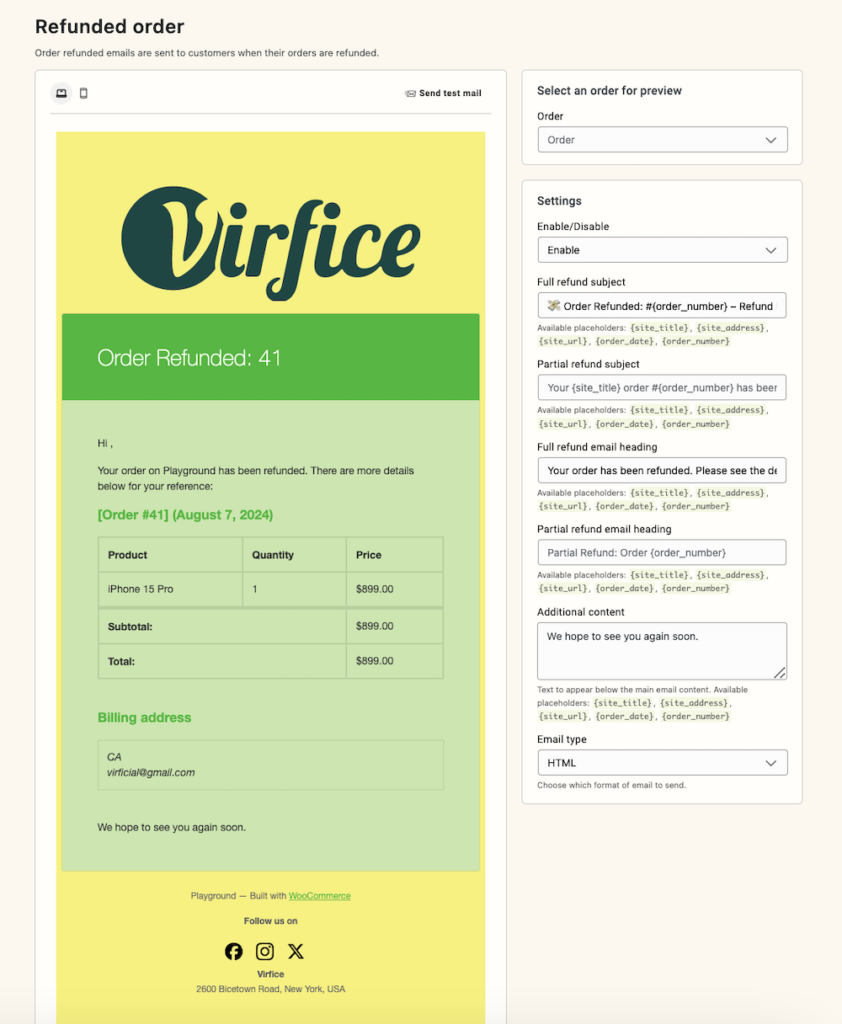
This email is sent to the customer when their order is refunded. It includes the order details and the amount refunded.
Customer Invoice
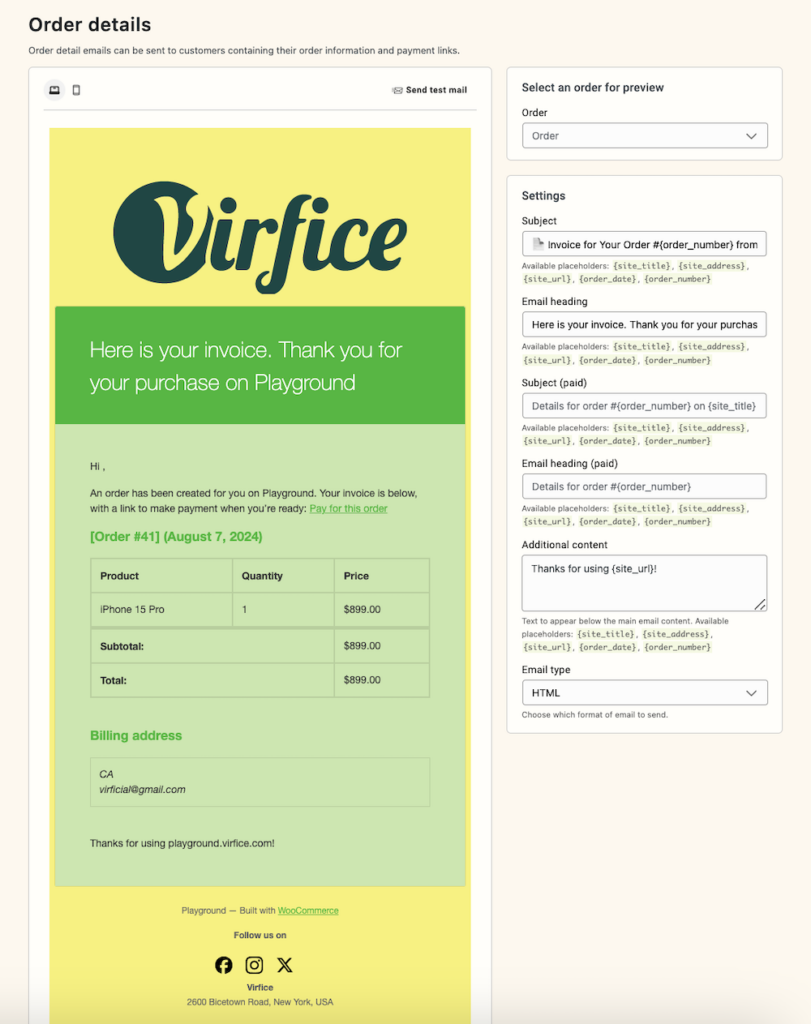
This email is sent to the customer containing their invoice. It includes order details and payment information.
Customer Note
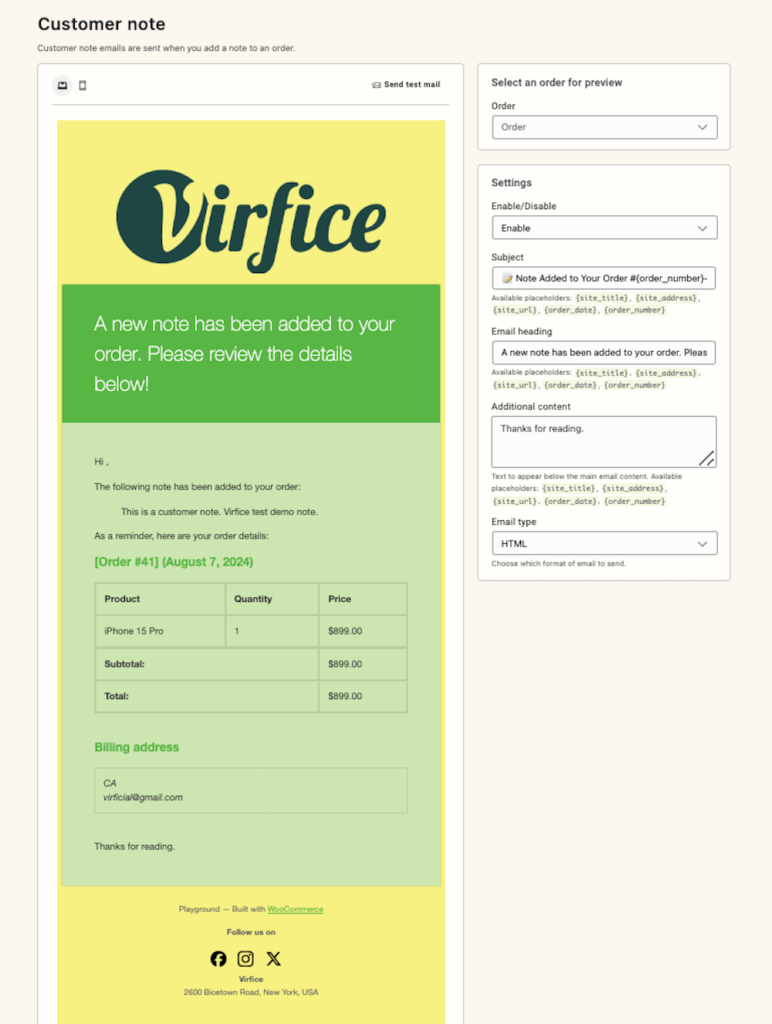
This email is sent to the customer when a note is added to their order by the store admin. It includes the order details and the content of the note.
Reset Password
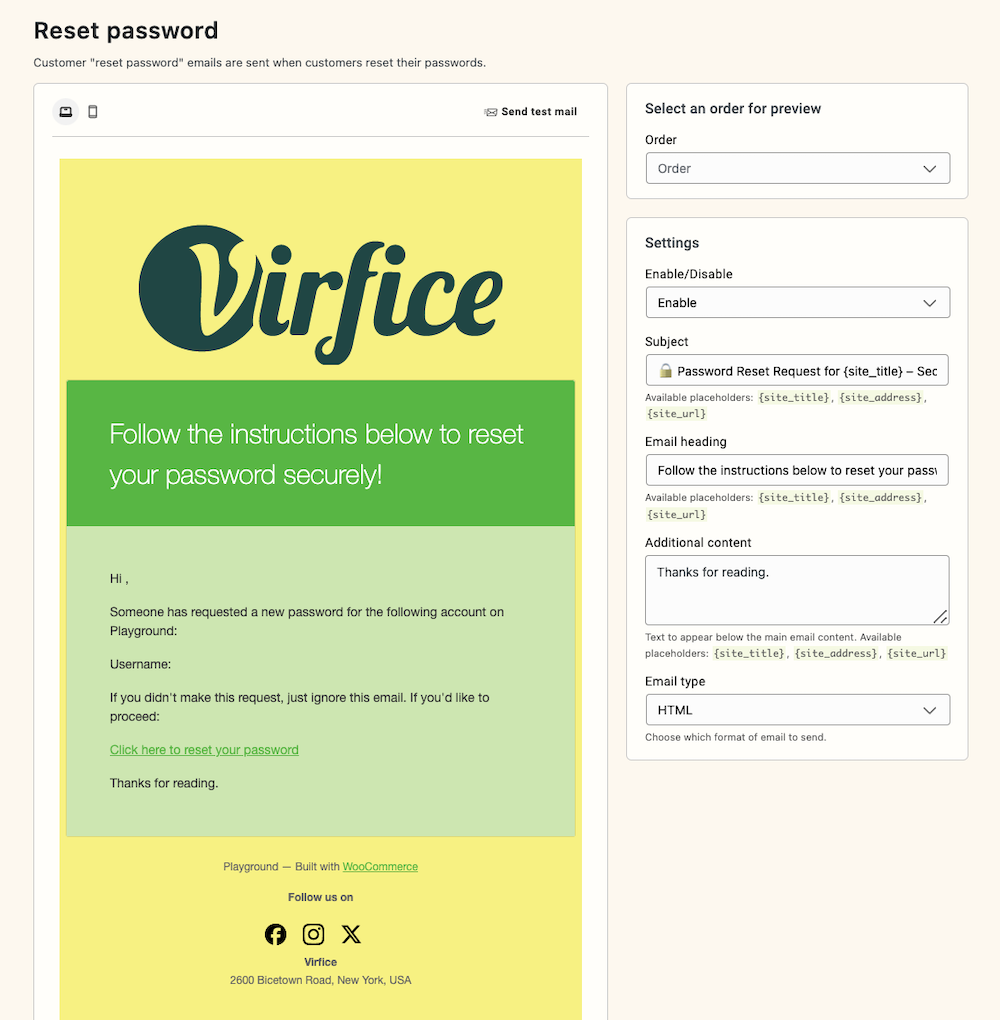
This email is sent to the customer when they request a password reset. It includes instructions on how to reset their password.
New Account
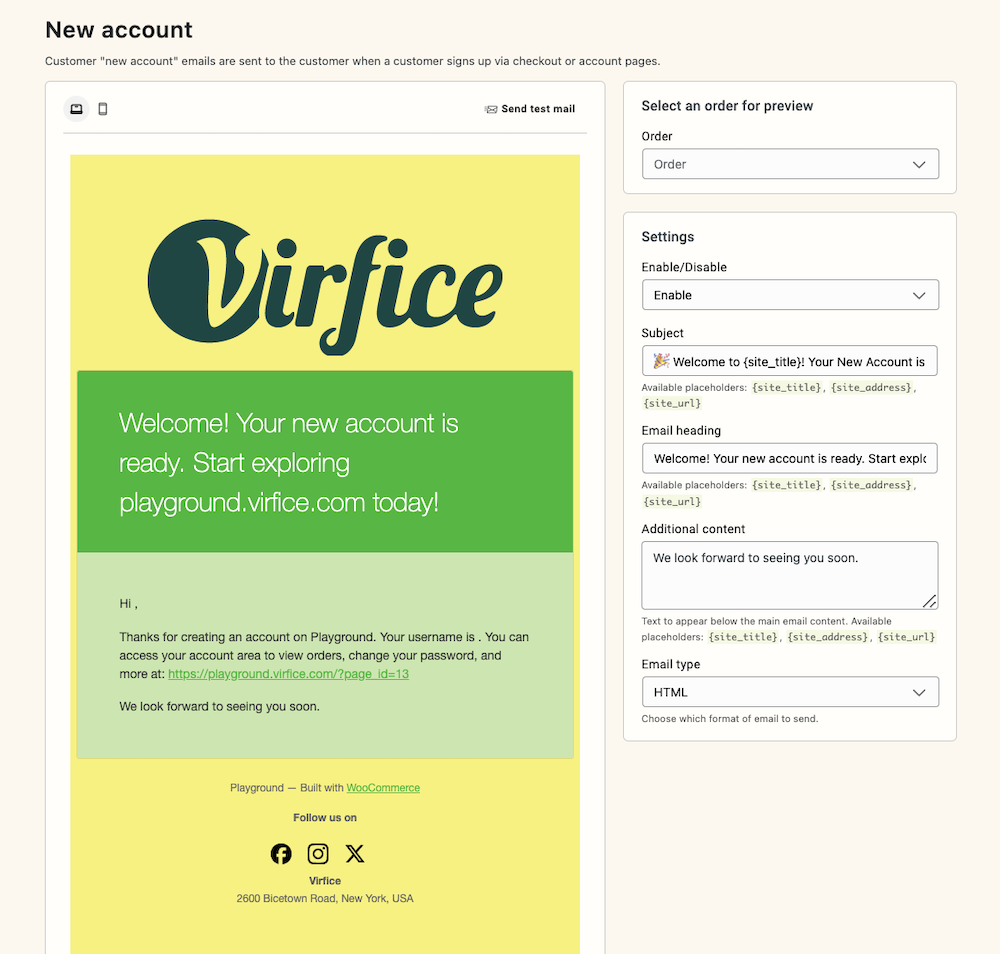
This email is sent to the customer when they create a new account. It includes a welcome message and account login details.
Social Links
Add social media links that will be included at the bottom of your emails if the option to show social media icons is selected.
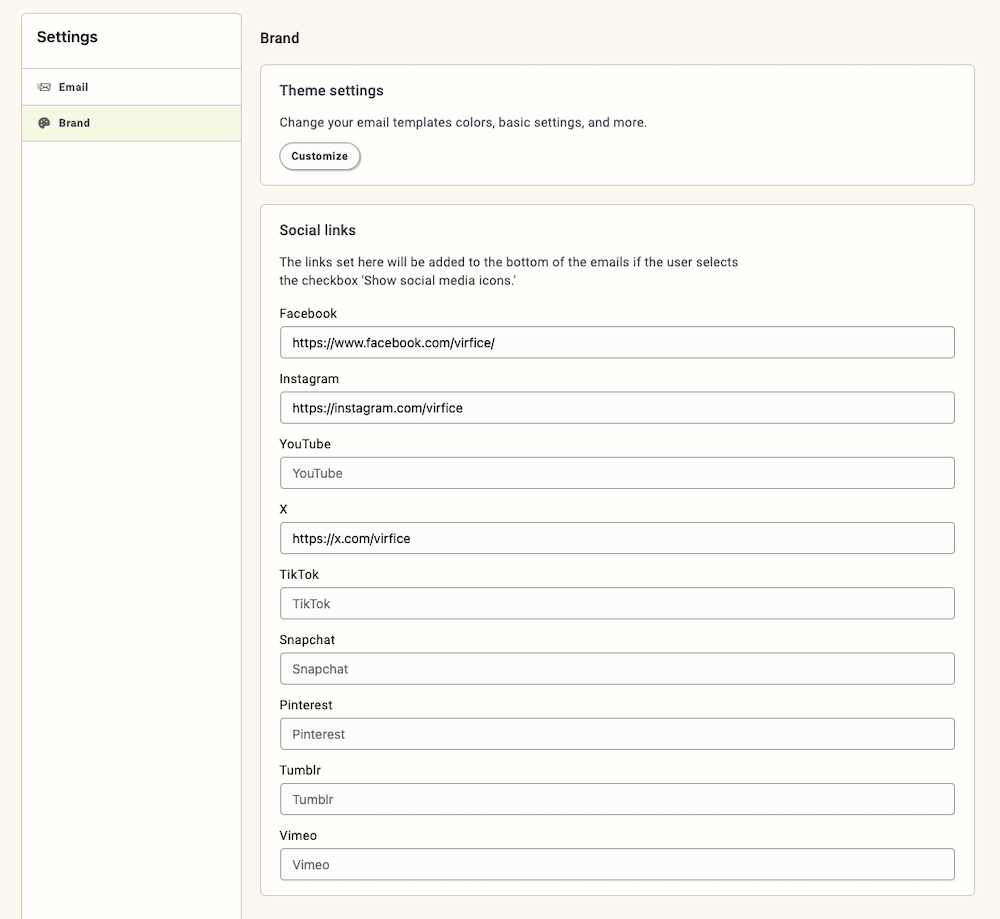
- Facebook: Enter your Facebook page URL.
- Instagram: Enter your Instagram profile URL.
- YouTube: Enter your YouTube channel URL.
- X (formerly Twitter): Enter your X profile URL.
- TikTok: Enter your TikTok profile URL.
- Snapchat: Enter your Snapchat profile URL.
- Pinterest: Enter your Pinterest profile URL.
- Tumblr: Enter your Tumblr blog URL.
- Vimeo: Enter your Vimeo profile URL.
Send test emails
To ensure your email templates look and function correctly, you can send test emails using the Virfice plugin. Here’s how to do it:
Send Test Mail
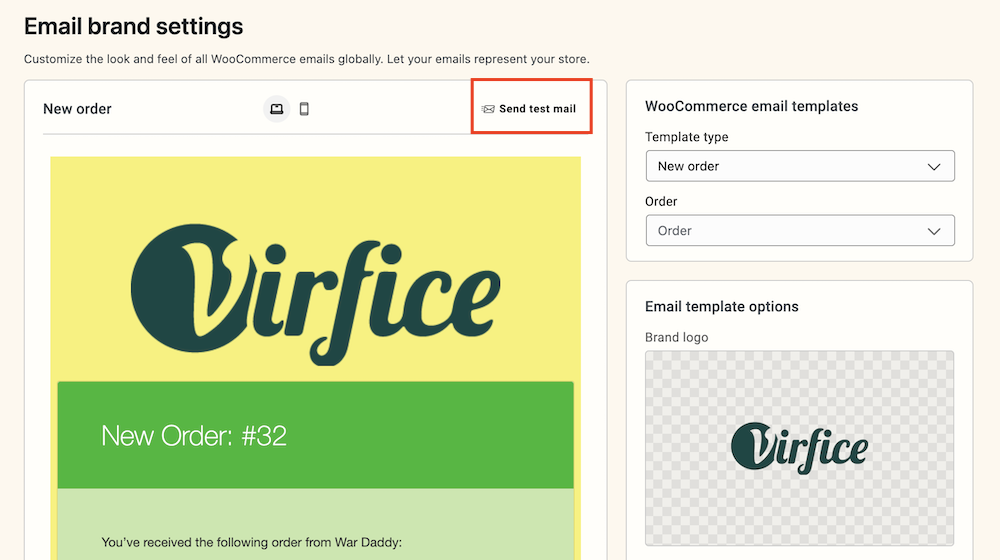
In the “Email Brand Settings” page or any individual email page where you are customizing transactional emails, Click on the “Send test mail” button at the top right of the example email section.
Enter Recipients and send the Test Email
A modal window titled “Send test email” will appear. In the “Recipients” field, enter the email addresses to which you want to send the test email. Separate multiple email addresses with commas.
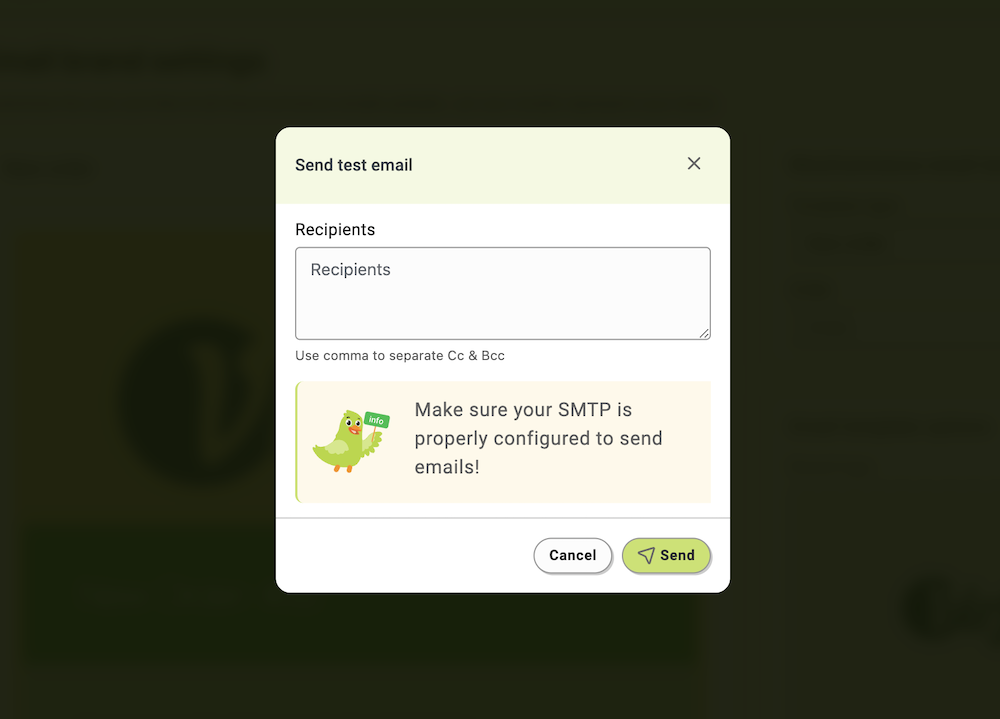
After entering the email addresses, click the “Send” button.
The test email will be sent to the specified recipients, allowing you to review the email’s content and appearance in real inboxes. Check your inbox (provided emails) to see how your store emails will look on customers’ inboxes.
