Want to manage WooCommerce store inventory smartly? Follow our guidelines to know the right tool and manage your WooCommerce store stock easily.
Managing inventory effectively is key to running a successful WooCommerce store. Whether you’re dealing with a few products or a vast catalog, having a smart inventory management strategy helps you avoid stockouts, reduce excess stock, and streamline your business operations. With WooCommerce’s flexible features and a few strategic tools, you can automate and optimize your inventory, saving time and minimizing manual effort.
In this guide, we’ll explore practical tips and tools that make it easy to keep track of your products, manage stock levels, and ensure your customers always have access to the items they need. Let’s dive in and make inventory management a seamless part of your WooCommerce store’s success.
Manage WooCommerce Store Inventory Smartly
Managing WooCommerce store inventory gets easier when you are using the right WooCommerce inventory management plugin. For this tutorial today, we will use WooCommerce Stock Manager, a robust tool designed specifically for WooCommerce users, enabling you to view, edit, and update inventory in bulk.
The plugin centralizes stock data, allowing you to monitor stock levels across multiple products and variations from a single interface, making it ideal for stores with large product catalogs. WooCommerce Stock Manager is a great choice if you want to manage WooCommerce store inventory smartly.
Let’s see how to use the plugin to manage your WooCommerce product stocks.
Step 1: Install the WooCommerce Stock Manager plugin
To get started, you need the WooCommerce Stock Manager plugin. Once you have the plugin, go to your WordPress dashboard. From there, navigate to Plugins > Add New Plugin > Upload Plugin. Once uploaded, select Install Now and then Activate. After activation, the WooCommerce Stock Manager interface will appear in your WooCommerce dashboard.
Step 2: Accessing the Stock Manager Interface
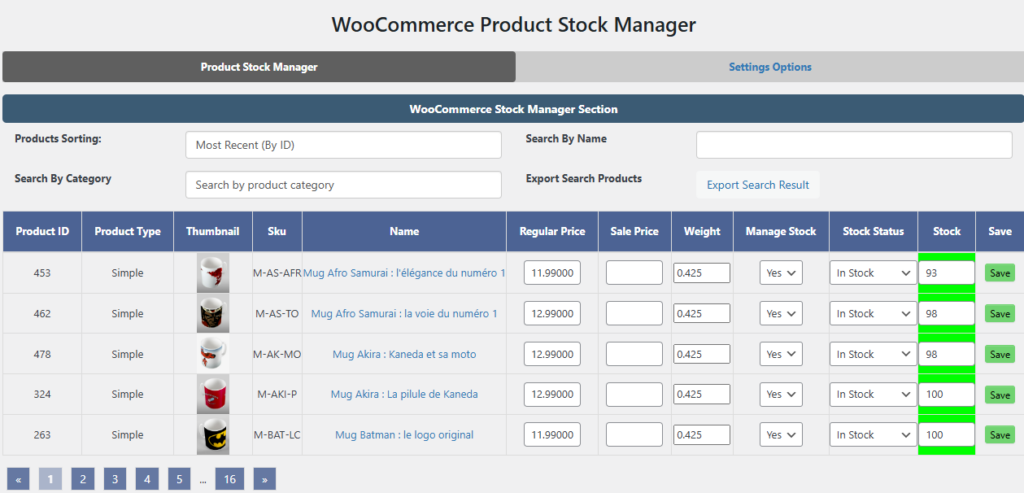
After activation, navigate to the Stock Manager section in WooCommerce. This brings up a dashboard displaying all products’ stock status, quantity, and other relevant details. Here, you can quickly review and adjust stock information. You can also sort products by stock levels, SKU, or name, easily finding products that need restocking or adjustment to manage WooCommerce store inventory.
Step 3: Setting Up Stock Parameters

In the Stock Manager dashboard, you’ll see columns for Stock Quantity, Stock Status, Product Name, and SKU. Start by selecting a product and adding a SKU if it doesn’t already have one. Next, set the stock quantity and choose the stock status (e.g., “In Stock,” “Out of Stock,” or “On Backorder“). These settings help you track stock levels and make it easier to categorize items based on availability.
Step 4: Managing Product Variations
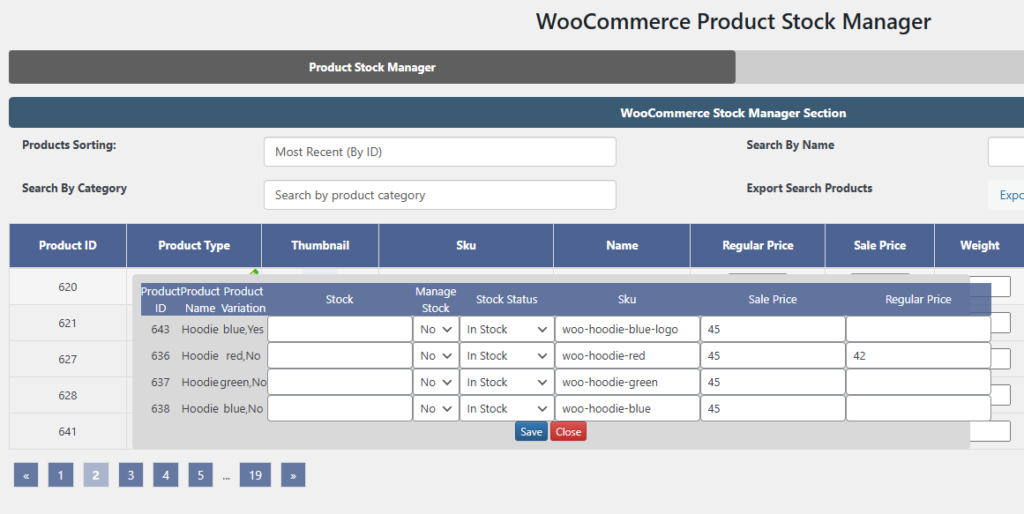
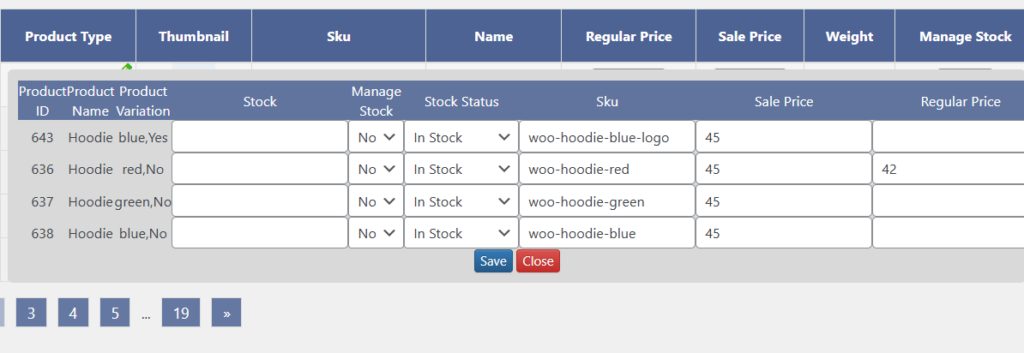
WooCommerce Stock Manager allows you to manage WooCommerce store inventory for each variation of a product, such as different sizes or colors. Click on a product to view its variations, then adjust the stock quantity and status for each. This is especially useful for stores offering products with multiple options, as it prevents customers from ordering unavailable variations.
Step 5: Bulk Updating Stock
One of the standout features of WooCommerce Stock Manager is bulk updating. Select multiple products to modify them simultaneously. Use the “Bulk Actions” dropdown to change stock levels, mark items as “In Stock,” or mark them as “Out of Stock.” This feature is particularly useful after a significant restocking or sales event, saving you time and ensuring consistency across products.
Step 6: Importing and Exporting Stock Data

If you use an external system for inventory management, you can import and export stock data with WooCommerce Stock Manager. Export your existing stock data as a CSV file or upload a new CSV to update your inventory. For large retailers, this feature enables quick and precise updates across multiple products. Make sure your CSV file follows the plugin’s format for a smooth import process.
Step 7: Setting Stock Thresholds and Alerts

WooCommerce Stock Manager allows you to set low-stock and out-of-stock thresholds, notifying you when items reach critical levels. Customize these thresholds in the plugin settings for different products, enabling proactive restocking. Once configured, you’ll receive notifications when stock runs low, helping you avoid stockouts and ensure product availability.
Step 8: Reviewing Stock History and Logs
WooCommerce Stock Manager includes a log feature that records every stock update. Access these logs to monitor recent changes, track stock status updates, and review bulk actions. Reviewing these logs can reveal inventory patterns, helping you plan restocking strategies and anticipate seasonal demand fluctuations.
Step 9: Using Shortcodes for Custom Displays

WooCommerce Stock Manager also provides shortcodes to display specific stock information on your website. For example, you could display a “Low Stock” message for certain items or an “In Stock” label for fully stocked products. This customization can create urgency during promotions and encourage customers to purchase before stock runs out. Check the plugin documentation for a full list of shortcodes and integration instructions.
Conclusion
If you want to manage WooCommerce store inventory, WooCommerce Stock Manager can help simplify inventory management with centralized control, bulk editing, and customizable alerts. By following this step-by-step guide, you can efficiently manage stock levels, reduce errors, and ensure that products are available across your store. With WooCommerce Stock Manager, inventory control becomes a breeze, letting you focus on growing your business and providing a seamless shopping experience for customers.


