Want to test WooCommerce emails before sending them? Follow our step-by-step tutorial to send test emails to your preferred email addresses while setting up your WooCommerce emails.
Ensuring that your WooCommerce emails are well-formatted and accurate is crucial for maintaining effective communication with your customers. Sending test emails is an essential step in this process, allowing you to verify that everything appears as intended before reaching your audience. Neglecting to send test emails can lead to poorly formatted messages, errors, and a lack of professionalism, which can harm your brand’s reputation.
Unfortunately, WooCommerce does not provide a default method for sending test emails, but that doesn’t mean it’s impossible. In this guide, we will show you how to send test emails to your preferred email address while setting up your WooCommerce emails. This will help you ensure that your emails are flawless and ready to impress your customers.
How to Test WooCommerce Emails Easily
There are many ways to send test emails for WooComerce emails. We will use a user-friendly plugin to get this done. For this tutorial, we will use Email Customizer for WooCommerce – Virfice.
The plugin provides an easy way to test your WooCommerce email templates. Here’s a step-by-step guide to help you send test WooCommerce emails using this plugin:
Step 1: Install and Activate the Plugin
First, you need to install the Email Customizer for WooCommerce – Virfice plugin. : Log in to your WordPress admin area. Go to Your WordPress Dashboard. Go to Plugins > Add New. Now Search for the Plugin: Search “Virfice” and find “Email Customizer for WooCommerce | Virfice” and click on “Install Now”.
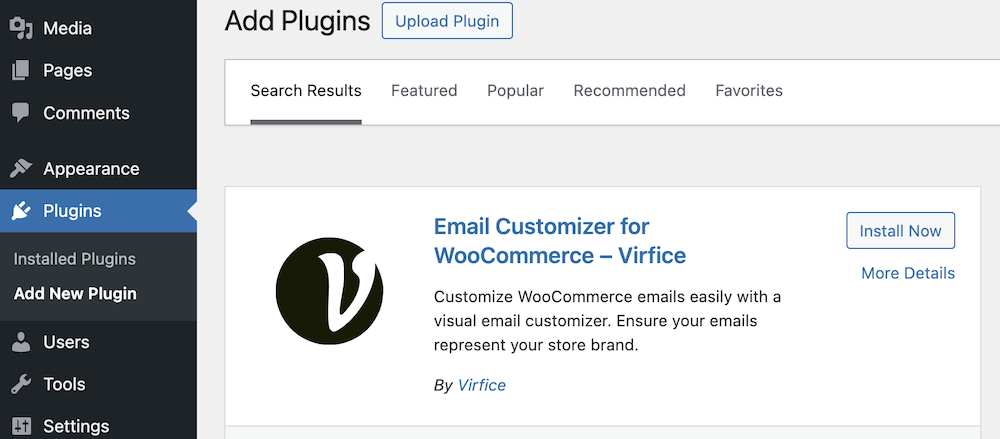
Click the “Install Now” button next to the “Email Customizer for WooCommerce – Virfice” plugin. Activate the Plugin: Once installed, click “Activate”.

Step 2: Access the Email Settings
Once you have installed the plugin, you need to configure the plugin. Go to your Dashboard > Virfice> Settings. Now click on “Email”.
Here you have all the settings related to emails! It also has links to the guide to correctly configure your emails.

Here you can add your email name, email address, reply-to name, email address, store details to be added to your email footer, and more. Click “Save” at the top right to save the changes.
Step 3: Customize WooCommerce Emails
You need to check the emails you want to send to your customers. For that, you need to prepare your emails and customize them according to your store brand.
Fortunately, you can do that with the “Email Customizer for WooCommerce – Virfice” plugin too.
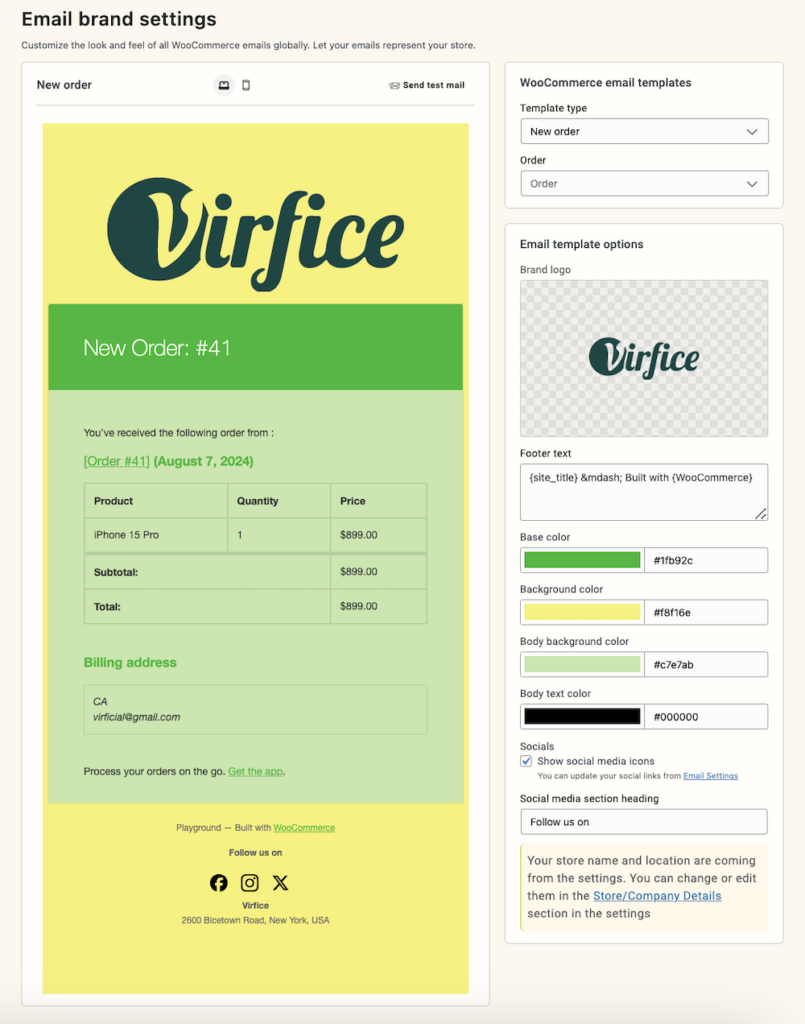
Go to your dashboard > Virfice> Settings. Now click on “Brand”. Now click on the “Customize” button. You will be taken to the email brand settings, where you will be able to upload the store logo, choose background color, choose body color, pick text color, and decide whether to have social media icons on the emails.
The brand settings point to editable parts. This is where you can change the look and feel of your WooCommerce emails by customizing the design globally for all transaction emails.
Note: You need to have orders and products in your store to display content in emails. Please create dummy products and orders if you don't have them.
Also, you can customize all individual emails for WooCommerce just by going to your Dashboard > Virfice > Emails.
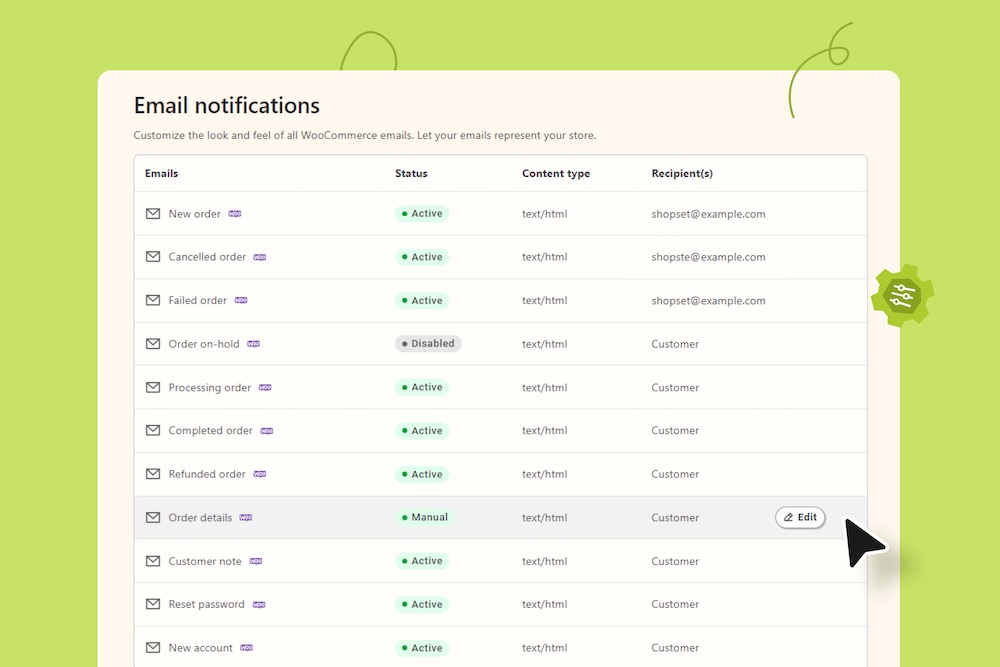
Open any email you want to customize by adding content, changing the header, title, and more.
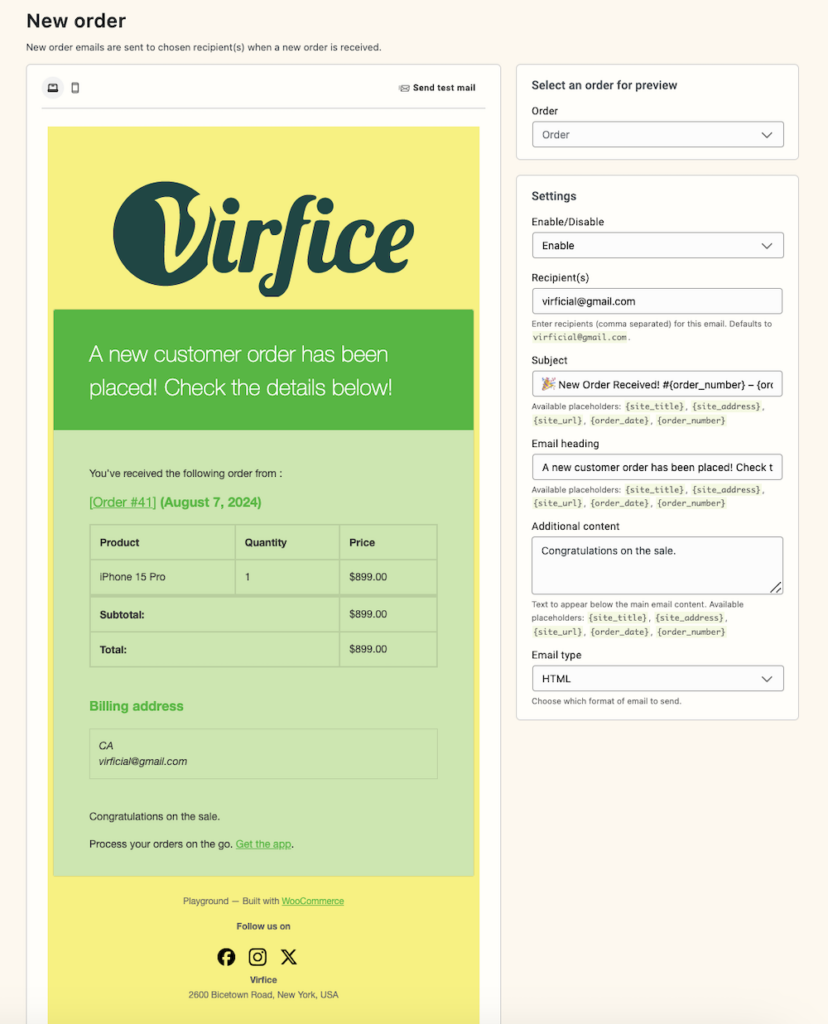
Follow our detailed tutorial on customizing WooCommerce emails. Also, you can follow the Email Customizer for WooCommerce – Virfice plugin’s documentation for more.
Step 4: Test WooCommerce Emails
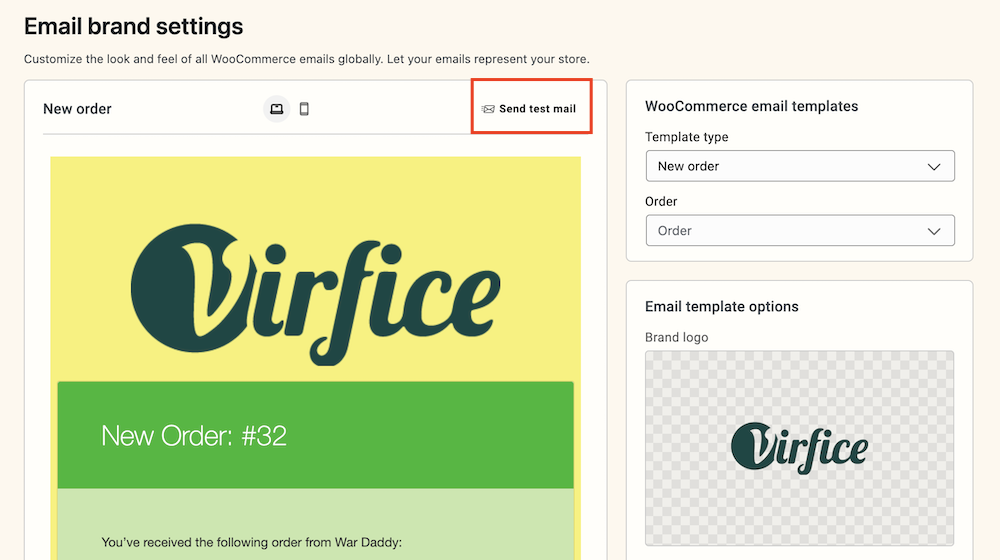
Once you have customized the emails, you can test WooCommerce emails to see how they will look in customers’ inboxes. Go to email brand settings again (dashboard > Virfice> Settings. Now click on “Brand”. Now click on “Customize”).
Now select the email type on your right panel and click on “Send test email”
A modal window titled “Send test email” will appear. In the “Recipients” field, enter the email addresses to which you want to send the test email. Separate multiple email addresses with commas.
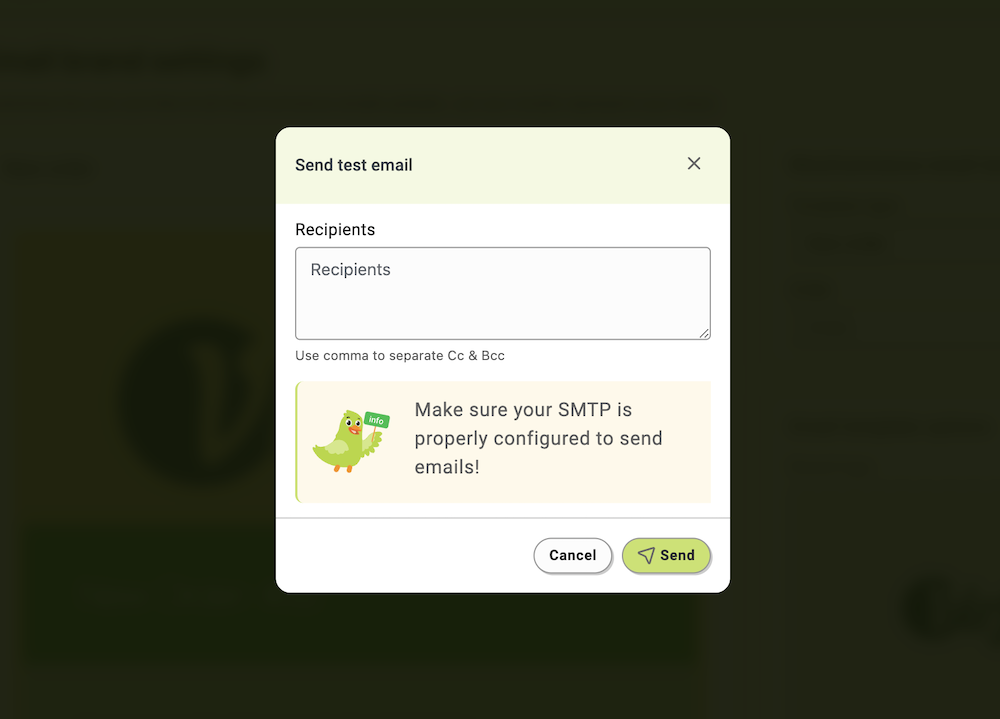
After entering the email addresses, click the “Send” button.
You can send test emails for all WooCommerce emails from here.
Note: You need to make sure your SMTP is properly configured to send emails!
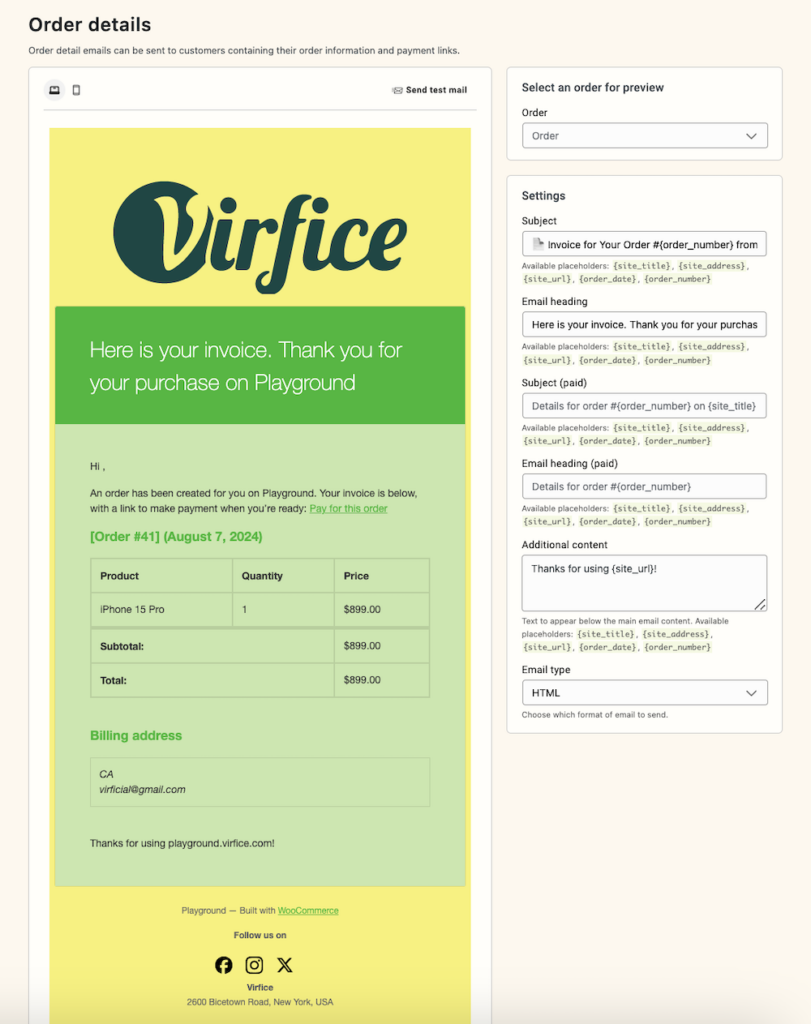
Alternatively, you can send test emails while customizing the individual emails. Go to Virfice > Emails.

Click on any email you want to customize. Once customization is done. Click on “Send test email” enter your email address and click “Send”.
Review the Test Email
- Check Your Inbox: Go to the inbox of the email address you specified in the test email section.
- Review the Email: Open the email and review its content, layout, and any dynamic data to ensure everything is displayed correctly.
- Make Adjustments if Necessary: If the email does not appear as expected, go back to the email settings in WooCommerce and make the necessary adjustments.
By following these steps, you can easily test WooCommerce emails using the “Email Customizer for WooCommerce – Virfice” plugin. Regularly testing your emails helps maintain a professional appearance and ensures that your customers receive accurate information.
Apart from sending test emails, the plugin has plenty of other features to customize your WooCommerce emails. If you want your WooCommerce emails to speak for your store brand, you need to customize your emails. “Email Customizer for WooCommerce – Virfice” will be a great plugin to do that.

